One of my lovely classmates from the Blogging Your Way course invited me to do a guest post on her newly inaugurated blog Notabilia, and of course I said yes! She has recently moved from New York to Singapore and Notabilia is about her experience as an expat discovering Singapore, focusing on her interests in arts, culture, crafts, design etc. She has just launched her series Cooking With... and I'm glad to be the first one featured :) I shared a recipe for Pandan Kaya Cake, which is a cake you can find in local Singapore bakeries. Enough from me, go over to my guest post on Notabilia and read more!
I'm now back in Singapore for a month, and have an epic list of things to eat, see, do during my time here (for both work and holiday) that I would like to complete. Already I've had a very good meal at Les Amis, which I will blog about soon and have a couple more good restaurants lined up to check out. Definitely looking forward to catching up with friends and family as well. Stay tuned to this space as I bring you the curated version of my Singapore :)
December 10, 2010
November 22, 2010
Matcha Green Tea Sablés and Japanese Bakeries
I've been baking a lot this past week, and mainly green things for some bizarre reason, matcha (green tea) chiffon roll, matcha sables and also pandan cake. Matcha, a type of Japanese green tea, is a wonderful flavour that pairs really well with red bean and or black sesame, as many Japanese sweets and desserts attest to. The rich fragrant aroma and the bittersweet aftertaste of matcha lends itself well to most sweet endings - cakes, cookies, ice-cream, macarons, crème brûlée and the list goes on.

One of my go-to books for desserts is this Japanese pastry & dessert cookbook Okashi by Keiko Ishida. There are many basic recipes covered in the book such as different types of sponges, pastry creams and custards in addition to Japanese-style french pastries. What I love about the Japanese renditions are the delicateness and subtlety that Japanese bakers bring to the richer and heavier french cousins. And of course the infusion of traditional Japanese flavours like sesame, soy, red bean and of course the ubiquitous matcha green tea. The cakes are always oh-so-light, melt-in-your-mouth texture and you can always tell it's made with such care and precision.
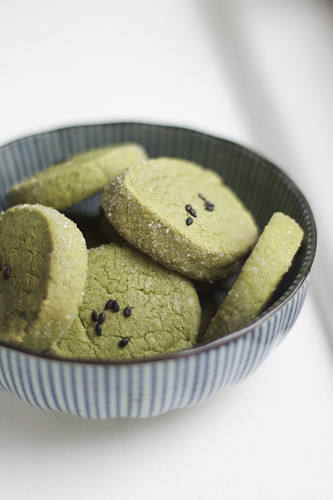
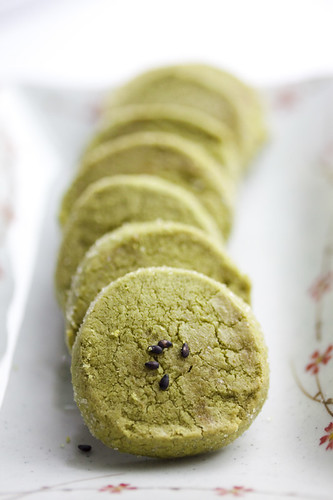
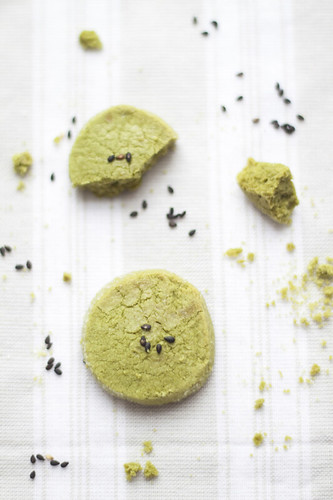
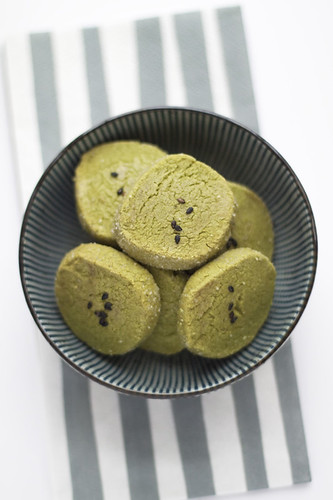
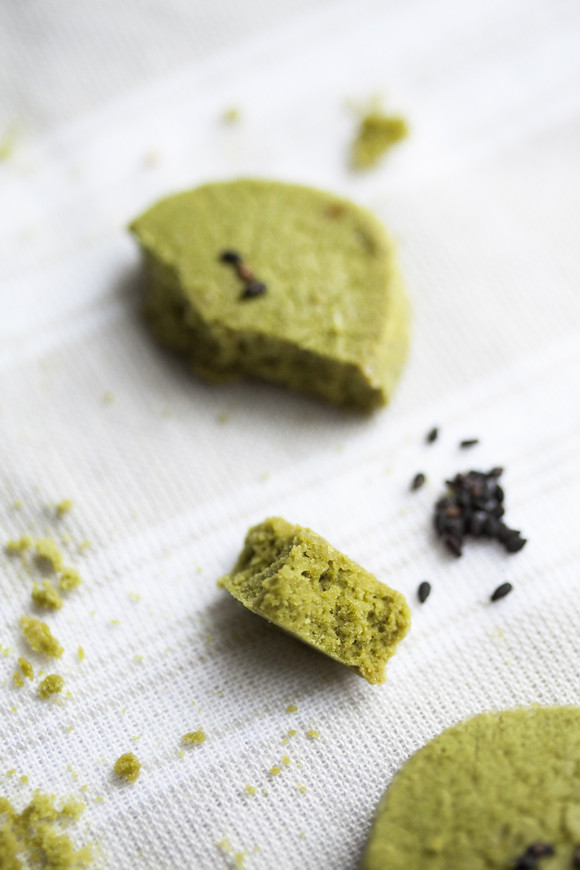
To satisfy my Japanese pastry craving, I made the matcha chiffon roll with red bean paste from the Okashi book but it didn't last long enough (all eaten up!) for me to photograph haha. I usually bake at night, which means I don't have good natural lighting for shooting (using artificial lighting and shooting at night is something I definitely need to learn more about!). Being too lazy to recreate it again, I decided to try something new out of the book, and decided to pick the matcha green tea sablés cookies since they looked pretty easy. They turned out pretty well and were quite addictive, I kept reaching for more and more! The recipe is posted below after the post, with some of my comments in italics.
I would also like to share with you some of my favourite Japanese bakeries. k-ki at Ann Siang Hill is one of my favourites, helmed by Japan-trained Singaporean pastry chef Kenneth Seah and his wife Delphine. They don't make large quantities of their cakes and the popular ones are often sold out before the end of the day. The Mont Blanc and Strawberry Tart are to die for! Another great bakery is Pâtisserie Glacé, which has amazing cheese tarts and strawberry shortcakes. It started out of a small shop in a quiet spot, but has since located to a bustling location in Icon at Tanjong Pagar. Both these bakeries are in Singapore and located within walking distance of my house, lucky me!
To get my fix here in London, William Curley (again walking distance to me, yay!) does a good Mont Blanc, and selection of green tea flavoured desserts as well, since his wife Suzue Curley is a Japanese pastry chef. I recently discovered Lanka at Primrose Hill,where I met up with Pleasure Monger and Going With My Gut. It serves up pretty decent Japanese cakes and French food as well. Sadly, I've never visited Japan, where I'm sure my heart (and stomach) will not be able to withstand the temptation and lure of the great Japanese pastries and food. That is definitely one trip I'll need to make in the near future. But till then, I'll just have to contend with indulging myself with the yummies from the above bakeries and making my own!

Green Tea Sablés
(from Okashi by Keiko Ishida)
240g pastry flour (I substituted this with 200g plain flour and 40g corn flour)
15g green tea powder
150g unsalted butter, room temperature
130g icing sugar
pinch of salt
2 egg yolks
1 egg white
40g granulated sugar
green tea leaves (or black sesame seeds), optional
Sift flour and green tea powder twice. Set aside.
(I measured out the flours and green tea powder in a big bowl and then sifted it onto parchment paper, and then re-sifted back into the bowl)
Beat butter, icing sugar and salt until soft and creamy. Add egg yolks and mix well. Add flour and green tea powder mixture and fold in with a spatula. Cover dough with plastic wrap and chill in refrigerator for about 15 minutes.
(I used the paddle attachment on my stand mixer to do the above mixing. The refrigeration is to harden the dough, as the butter might have become soft after all the handling/beating)
Take out dough from fridge and divide in half. Shape into logs about 3.5cm in diameter. Wrap the logs in parchment and refrigerate until firm. If not using immediately, wrap with cling film and freeze. Cookie dough can be kept for up to 2 months in the freezer.
Preheat oven to 150 deg Celsius. When dough is firm, cut logs into 7mm thick rounds. Dip edges in granulated sugar.
(I found it easier to coat the logs with sugar first, then to cut them. I also made several logs instead of 2 long logs as my dough kept breaking apart)
Place cookies on baking sheet lined with parchment paper. Brush a little egg white over the cookies and scatter a few green tea leaves on top if desired.
(I used black sesame seeds instead as I didn't have green tea leaves)
Bake for about 25 minutes, then remove and leave to cool on wire rack before serving. Store cookies in airtight container at room temperature for up to 10 days.


One of my go-to books for desserts is this Japanese pastry & dessert cookbook Okashi by Keiko Ishida. There are many basic recipes covered in the book such as different types of sponges, pastry creams and custards in addition to Japanese-style french pastries. What I love about the Japanese renditions are the delicateness and subtlety that Japanese bakers bring to the richer and heavier french cousins. And of course the infusion of traditional Japanese flavours like sesame, soy, red bean and of course the ubiquitous matcha green tea. The cakes are always oh-so-light, melt-in-your-mouth texture and you can always tell it's made with such care and precision.
To satisfy my Japanese pastry craving, I made the matcha chiffon roll with red bean paste from the Okashi book but it didn't last long enough (all eaten up!) for me to photograph haha. I usually bake at night, which means I don't have good natural lighting for shooting (using artificial lighting and shooting at night is something I definitely need to learn more about!). Being too lazy to recreate it again, I decided to try something new out of the book, and decided to pick the matcha green tea sablés cookies since they looked pretty easy. They turned out pretty well and were quite addictive, I kept reaching for more and more! The recipe is posted below after the post, with some of my comments in italics.


I would also like to share with you some of my favourite Japanese bakeries. k-ki at Ann Siang Hill is one of my favourites, helmed by Japan-trained Singaporean pastry chef Kenneth Seah and his wife Delphine. They don't make large quantities of their cakes and the popular ones are often sold out before the end of the day. The Mont Blanc and Strawberry Tart are to die for! Another great bakery is Pâtisserie Glacé, which has amazing cheese tarts and strawberry shortcakes. It started out of a small shop in a quiet spot, but has since located to a bustling location in Icon at Tanjong Pagar. Both these bakeries are in Singapore and located within walking distance of my house, lucky me!
To get my fix here in London, William Curley (again walking distance to me, yay!) does a good Mont Blanc, and selection of green tea flavoured desserts as well, since his wife Suzue Curley is a Japanese pastry chef. I recently discovered Lanka at Primrose Hill,where I met up with Pleasure Monger and Going With My Gut. It serves up pretty decent Japanese cakes and French food as well. Sadly, I've never visited Japan, where I'm sure my heart (and stomach) will not be able to withstand the temptation and lure of the great Japanese pastries and food. That is definitely one trip I'll need to make in the near future. But till then, I'll just have to contend with indulging myself with the yummies from the above bakeries and making my own!


Green Tea Sablés
(from Okashi by Keiko Ishida)
240g pastry flour (I substituted this with 200g plain flour and 40g corn flour)
15g green tea powder
150g unsalted butter, room temperature
130g icing sugar
pinch of salt
2 egg yolks
1 egg white
40g granulated sugar
green tea leaves (or black sesame seeds), optional
Sift flour and green tea powder twice. Set aside.
(I measured out the flours and green tea powder in a big bowl and then sifted it onto parchment paper, and then re-sifted back into the bowl)
Beat butter, icing sugar and salt until soft and creamy. Add egg yolks and mix well. Add flour and green tea powder mixture and fold in with a spatula. Cover dough with plastic wrap and chill in refrigerator for about 15 minutes.
(I used the paddle attachment on my stand mixer to do the above mixing. The refrigeration is to harden the dough, as the butter might have become soft after all the handling/beating)
Take out dough from fridge and divide in half. Shape into logs about 3.5cm in diameter. Wrap the logs in parchment and refrigerate until firm. If not using immediately, wrap with cling film and freeze. Cookie dough can be kept for up to 2 months in the freezer.
Preheat oven to 150 deg Celsius. When dough is firm, cut logs into 7mm thick rounds. Dip edges in granulated sugar.
(I found it easier to coat the logs with sugar first, then to cut them. I also made several logs instead of 2 long logs as my dough kept breaking apart)
Place cookies on baking sheet lined with parchment paper. Brush a little egg white over the cookies and scatter a few green tea leaves on top if desired.
(I used black sesame seeds instead as I didn't have green tea leaves)
Bake for about 25 minutes, then remove and leave to cool on wire rack before serving. Store cookies in airtight container at room temperature for up to 10 days.

November 7, 2010
Five Faves - Great Blogs You Should Check Out!
I've spent the past 2 nights trawling through lots of blogs and getting incredibly inspired by all the talent that's out there. Given my varied interests, my google reader list is getting longer and longer by the day and I want to read them all! I've been surfing tons of food (but of course!), interior & styling, wedding and event design and also photography blogs and I just can't get enough of them. Some of my favourites and new discoveries are shared below and I hope you get equally inspired, as I have.
1. Pinecone Camp
Janis is an interiors and lifestyle photographer that is multi-talented from Vancouver. She bakes, crafts, styles and takes incredibly gorgeous pictures! Check out her portfolio where she's done shoots for numerous publications. She's also got a lovely etsy store where you can buy her photo prints. I simply love her aesthetic and style :)
2. The Loveliest Day
I came across Melissa of The Loveliest Day through Ruffled, which is a wedding portal that features real weddings, diy ideas and other inspirational concepts for weddings. I saw her French vintage inspired patisserie bridal shower shoot on it and immediately fell in love with her style. Based in Southern California, she's just started her event design and styling business, turning something which is her love and passion into a full-time career (something I'm super envious of!). Definitely someone to watch out for in the wedding design business!
3. Pleasure Monger
What can I say about this lovely lady that hasn't already been said :) Rachel posts tantalising pictures and stories about her culinary and gastronomic adventures and is a joy to read. Her writing takes you into her world and makes you feel like she's an old friend chatting and tell you about what's new in her life. An aspiring baker, she churns out lots of goodies and is truly a domestic goddess!
4. The Found Blog
Jeni Maus runs a vintage-inspired prop rental and styling business Found Vintage Rentals (check out the full collection!!) in California and her ever-growing collection of vintage furniture, accents, crockery and trinkets would drive anyone with props-addiction (like me) insane with jealousy! Her eye for good finds and aesthetic is amazing, and I would love to visit her showroom one day (if only it wasn't halfway round the world!). Her pieces have been featured in many weddings and shoots and is an incredible source of inspiration!
5. What Katie Ate
Katie Quinn Davies is a Sydney-based food photographer and food stylist with a gorgeous portfolio. Her work is stunning and has a simple yet understated elegance in the way she styles and shoots. Definitely aspirational and inspirational for me, I just melt when I see her photos. Other than the beautiful photos, she also posts recipes and reviews on restaurants in the Aussie/Sydney food scene. What more can a foodie ask for?
There's really so much more out there that I haven't been able to feature here, and hopefully I will be able to introduce interesting finds and perennial favourites to you, though I suspect my list will grow faster than I can blog about them :)
1. Pinecone Camp
Images from Pinecone Camp
Janis is an interiors and lifestyle photographer that is multi-talented from Vancouver. She bakes, crafts, styles and takes incredibly gorgeous pictures! Check out her portfolio where she's done shoots for numerous publications. She's also got a lovely etsy store where you can buy her photo prints. I simply love her aesthetic and style :)
2. The Loveliest Day
I came across Melissa of The Loveliest Day through Ruffled, which is a wedding portal that features real weddings, diy ideas and other inspirational concepts for weddings. I saw her French vintage inspired patisserie bridal shower shoot on it and immediately fell in love with her style. Based in Southern California, she's just started her event design and styling business, turning something which is her love and passion into a full-time career (something I'm super envious of!). Definitely someone to watch out for in the wedding design business!
3. Pleasure Monger
What can I say about this lovely lady that hasn't already been said :) Rachel posts tantalising pictures and stories about her culinary and gastronomic adventures and is a joy to read. Her writing takes you into her world and makes you feel like she's an old friend chatting and tell you about what's new in her life. An aspiring baker, she churns out lots of goodies and is truly a domestic goddess!
4. The Found Blog
Jeni Maus runs a vintage-inspired prop rental and styling business Found Vintage Rentals (check out the full collection!!) in California and her ever-growing collection of vintage furniture, accents, crockery and trinkets would drive anyone with props-addiction (like me) insane with jealousy! Her eye for good finds and aesthetic is amazing, and I would love to visit her showroom one day (if only it wasn't halfway round the world!). Her pieces have been featured in many weddings and shoots and is an incredible source of inspiration!
5. What Katie Ate
Katie Quinn Davies is a Sydney-based food photographer and food stylist with a gorgeous portfolio. Her work is stunning and has a simple yet understated elegance in the way she styles and shoots. Definitely aspirational and inspirational for me, I just melt when I see her photos. Other than the beautiful photos, she also posts recipes and reviews on restaurants in the Aussie/Sydney food scene. What more can a foodie ask for?
There's really so much more out there that I haven't been able to feature here, and hopefully I will be able to introduce interesting finds and perennial favourites to you, though I suspect my list will grow faster than I can blog about them :)
Labels:
blogs,
food,
lifeststyle
November 3, 2010
Refreshing Pear Sorbet, with Mint & Lime
I've been trying to do so many different things lately. Having recently finished (most of) the Blogging Your Way class, I've been thinking a lot about how to improve this blog, what I want to achieve with it and most of all, what is it that I'm passionate about and want to pursue. As you may have noticed, I've changed the layout of the blog and made some slight tweaks, begun to consciously style my photos a bit more and put effort into taking good pictures. I've got a lot more room for improvement obviously, but I'm really grateful for and blessed by all the encouragement that I've gotten from friends and visitors to this blog. It makes me want to do more, and create even more beautiful things and images. I'd especially like to thank Arianna of Arianna Interiors, who featured my blog yesterday here. I'm sooo excited cos it's the first time I've ever been featured on someone else's blog! :) I met the lovely Arianna together with a group of other design bloggers, who are forming dbcollective (Design Bloggers Collective) as a way to further promote design blogs and the design community.
Another thing keeping me busy is Pinterest, a new visual bookmarking/cataloguing site. Check it out if you haven't already, it's addictive! I've been surfing relentlessly and 'pinning' things rabidly. My pins and boards can be found here or follow the link on the right column. There's so much more I want to do, like take time to properly look through all my fellow BYW classmates' blogs and do more 'discovery' research, read up on photography techniques, just read (the new Jasper Fforde!), pick up my flower arrangements again, and of course bake and cook!
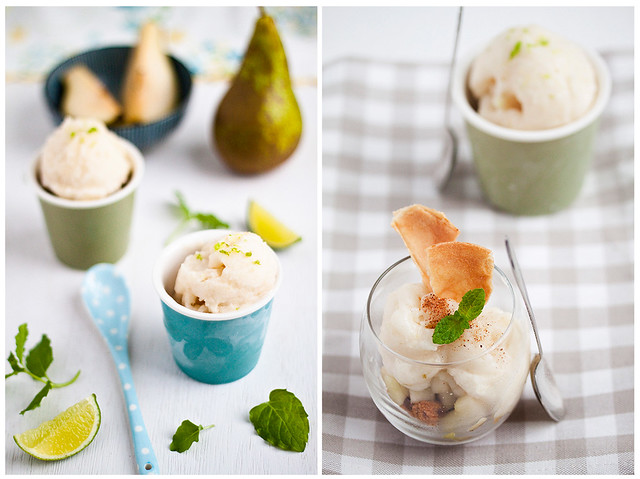
Speaking of which, I haven't made ice-cream in a while. In fact, it's been really long since my freezer bowl cracked and leaked weird blue fluid (which was quite a while back). The replacement bowl has been sitting around for a while now and I thought it was about time for a christening. I eyed some pears and thought to myself that they'd make a great refreshing sorbet. I'll just pretend it's still summer.
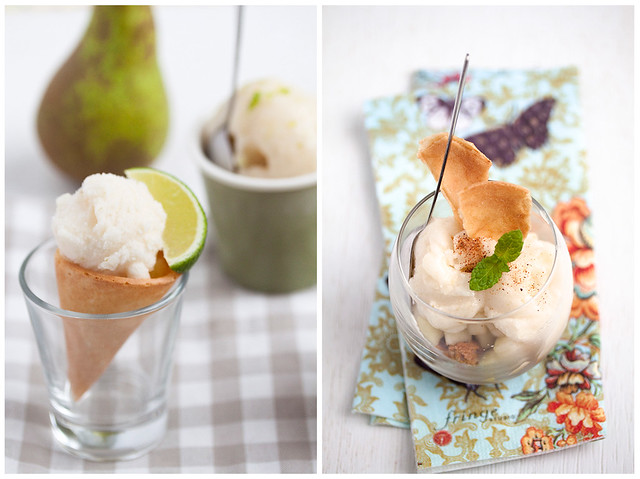
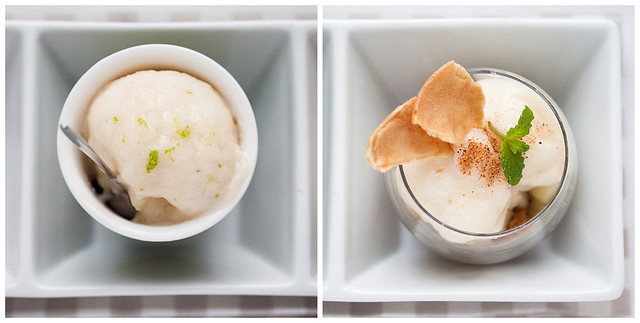
To kick it up a notch (a la Emeril), I wanted to add more flavours to the pears. Initially, I wanted to pair the pear (no pun intended) with ginger in order to spice it up but I didn't have any ginger in the house. What I did have was my newly acquired mint plant (now dead sadly) and some lime, which I thought would really enhance the delicate flavour of the pear. I'm a big fan of lime, vs lemon, as I feel like there's that extra fragrance to it. True enough, the sorbet was heavenly, light yet with a creamy texture from the pear flesh, gently spiced with cinnamon and nutmeg and laced with the refreshing notes of mint and a hint of lime. I also put together a simple verrine dessert, as per the serving suggestion below. Enjoy!
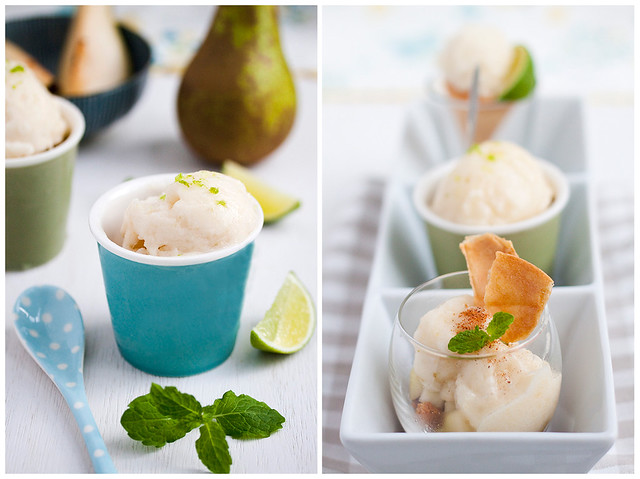
Pear Sorbet, with Mint & Lime
(makes about 500ml, my ice-cream maker is a 0.6L)
4 pears, peeled and cubed
70g caster sugar
70g glucose (replace with sugar if unavailable)
50ml water
half a lime (you will need both the juice and the zest)
3-4 sprigs of mint
half tsp nutmeg
half tsp cinnamon
(the spices are really to taste, so it's up to you how much or little you want to put)
Heat the sugar, glucose and water in a saucepan and bring to a simmer.
When the sugar has melted, and the syrup is simmering, add the diced pears and spices into the sugar syrup. Squeeze the lime into the mixture (retain the lime, as you'd need the zest later). Turn the heat down to low.
Take the saucepan off the heat once pears have softened. This should take about 10 minutes.
Add the mint leaves to the mixture and grate the zest of the lime into it. Let this steep to impart their flavours while the mixture is cooling. You don't want to add the mint and zest during the cooking process (or while the mixture is very hot) as the flavours will be over-extracted and become bitter. Let the mixture cool for about an hour.
Remove the mint and puree the mixture. I used a hand blender, but I suppose you can use a food processor or stand blender as well, as long as the mixture is turned into a smooth puree. Transfer into a container and refrigerate, preferably overnight.
Turn on your ice-cream maker as per your manufacturer's instructions (if using a freezer bowl or disc type, this should be placed in the freezer at least overnight, I usually just keep mine in the freezer whenever I'm not using it).
Pour chilled mixture into freezer bowl and churn. If your bowl is chilled enough, this should not take more than 15 minutes to churn into a frozen mixture. The longer you allow the machine to churn, the more likelihood of bigger ice crystals which will result in an unsmooth ice-cream. So you'd ideally want a cold machine that will do the job fast.
Spoon sorbet into a container and store in freezer or serve immediately.
Serving suggestion:
Speculoos biscuits, crushed
Pears, cut into small cubes (I soak these in a lemon-water mixture to prevent oxidation)
Pear sorbet
Spoon 2 tsps of crushed speculoos into a transparent serving glass.
Add 2 tsps of chopped pears.
Top with a scoop of pear sorbet.
Garnish with a sprig of mint and some wafers.
Another thing keeping me busy is Pinterest, a new visual bookmarking/cataloguing site. Check it out if you haven't already, it's addictive! I've been surfing relentlessly and 'pinning' things rabidly. My pins and boards can be found here or follow the link on the right column. There's so much more I want to do, like take time to properly look through all my fellow BYW classmates' blogs and do more 'discovery' research, read up on photography techniques, just read (the new Jasper Fforde!), pick up my flower arrangements again, and of course bake and cook!

Speaking of which, I haven't made ice-cream in a while. In fact, it's been really long since my freezer bowl cracked and leaked weird blue fluid (which was quite a while back). The replacement bowl has been sitting around for a while now and I thought it was about time for a christening. I eyed some pears and thought to myself that they'd make a great refreshing sorbet. I'll just pretend it's still summer.

To kick it up a notch (a la Emeril), I wanted to add more flavours to the pears. Initially, I wanted to pair the pear (no pun intended) with ginger in order to spice it up but I didn't have any ginger in the house. What I did have was my newly acquired mint plant (now dead sadly) and some lime, which I thought would really enhance the delicate flavour of the pear. I'm a big fan of lime, vs lemon, as I feel like there's that extra fragrance to it. True enough, the sorbet was heavenly, light yet with a creamy texture from the pear flesh, gently spiced with cinnamon and nutmeg and laced with the refreshing notes of mint and a hint of lime. I also put together a simple verrine dessert, as per the serving suggestion below. Enjoy!

Pear Sorbet, with Mint & Lime
(makes about 500ml, my ice-cream maker is a 0.6L)
4 pears, peeled and cubed
70g caster sugar
70g glucose (replace with sugar if unavailable)
50ml water
half a lime (you will need both the juice and the zest)
3-4 sprigs of mint
half tsp nutmeg
half tsp cinnamon
(the spices are really to taste, so it's up to you how much or little you want to put)
Heat the sugar, glucose and water in a saucepan and bring to a simmer.
When the sugar has melted, and the syrup is simmering, add the diced pears and spices into the sugar syrup. Squeeze the lime into the mixture (retain the lime, as you'd need the zest later). Turn the heat down to low.
Take the saucepan off the heat once pears have softened. This should take about 10 minutes.
Add the mint leaves to the mixture and grate the zest of the lime into it. Let this steep to impart their flavours while the mixture is cooling. You don't want to add the mint and zest during the cooking process (or while the mixture is very hot) as the flavours will be over-extracted and become bitter. Let the mixture cool for about an hour.
Remove the mint and puree the mixture. I used a hand blender, but I suppose you can use a food processor or stand blender as well, as long as the mixture is turned into a smooth puree. Transfer into a container and refrigerate, preferably overnight.
Turn on your ice-cream maker as per your manufacturer's instructions (if using a freezer bowl or disc type, this should be placed in the freezer at least overnight, I usually just keep mine in the freezer whenever I'm not using it).
Pour chilled mixture into freezer bowl and churn. If your bowl is chilled enough, this should not take more than 15 minutes to churn into a frozen mixture. The longer you allow the machine to churn, the more likelihood of bigger ice crystals which will result in an unsmooth ice-cream. So you'd ideally want a cold machine that will do the job fast.
Spoon sorbet into a container and store in freezer or serve immediately.
Serving suggestion:
Speculoos biscuits, crushed
Pears, cut into small cubes (I soak these in a lemon-water mixture to prevent oxidation)
Pear sorbet
Spoon 2 tsps of crushed speculoos into a transparent serving glass.
Add 2 tsps of chopped pears.
Top with a scoop of pear sorbet.
Garnish with a sprig of mint and some wafers.

Labels:
desserts,
ice-cream,
reflections
October 25, 2010
Mactweets Mac Attack 12 Challenge - Fig and Mascarpone Macarons
Once again, it's Mactweets Mac Attack time! This month, the theme is Pinkarons for Pinktober Challenge in honour of Breast Cancer Awareness month in October. After a long hiatus (I can't even remember when was the last time I made macarons), I am finally getting my act together and rejoining the Mac Madness, with some gentle prodding from the lovely Jamie over at Life's A Feast :)
Inspired by my recent trip to Marrakech and the wonderfully bright coloured decorative items such as lamps, glassware, carpets, ceramics etc, I decided to make macarons in various shades of pink and fill them with a fig and mascarpone cream. The styling for the photos were also inspired by the celebration of all things feminine so I decided to shoot the macarons as if they were precious gems in a jewellery collection. A little unusual, but I was pleased with the results. I'd like to think of these macarons as Jewels of Marrakech... I'm thinking of submitting some of my pics to Foodgawker or Tastespotting (never done so before!) but I've heard that it needs to cropped in a certain way, sharp, whitish, etc. This set of pics are pretty much close-up and composed for portrait orientation (as opposed to the square pics foodgawker looks for) so I might have to go search through my discarded shots. Anyway, in the meantime, it's all just for you guys!
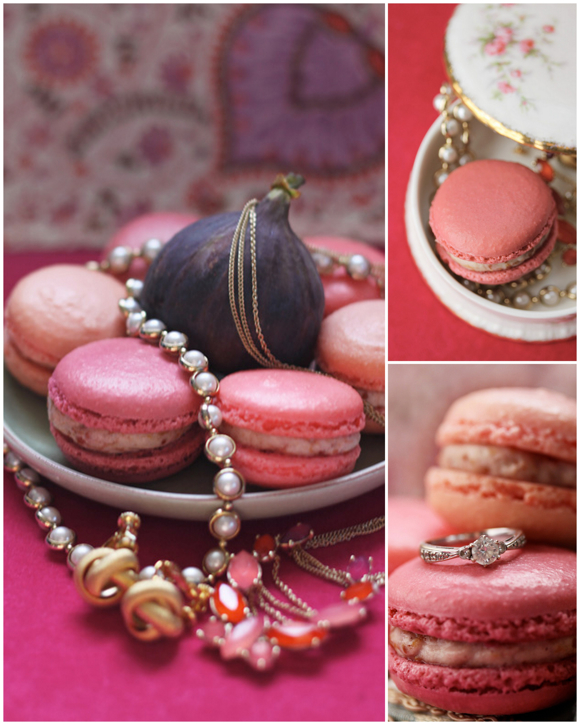
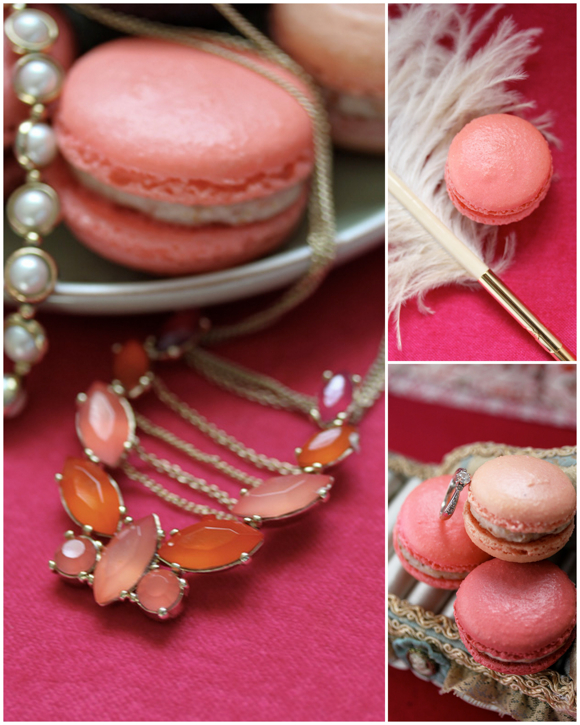
I used my usual recipe for macarons, except that I divided the batter and coloured them 3 different shades of pink.
Macaron Shells (makes about 50-54 shells)
recipe adapted from Cannelle & Vanille
100g egg whites, aged
3g egg white powder
130g almond flour (blitz in food processor to get a finer texture)
160g icing sugar
55g castor sugar
pink gel food colouring
Sift icing sugar and processed almond flour together in a bowl. Set aside.
Mix egg whites with egg white powder and whisk in electric mixer until soft peaks on medium high speed.
Lower speed on electric mixer and add in castor sugar slowly while still whisking until fully incorporated. Continue whisking on medium high speed until your egg white meringue mixture reaches stiff peak stage.
Fold in 1/3 of dry ingredients (icing sugar + almond flour) into meringue with a spatula gently. Add in 1/3 more and fold again before mixing in the last 1/3 of the dry ingredients. Make sure all dry ingredients are incorporated into the meringue and start folding mixture more vigorously to form a shiny batter with the consistency of flowing magma or drips down like ribbons when you lift the batter up and let it drip down, and it should slowly disappear into itself without leaving a peak. Be careful not to over mix. If you are adding colour, add it just after all dry ingredients have been incorporated and before working the mixture into a shiny mass. (I divided the batter when the dry and wet ingredients were roughly incorporated, and then added food colouring to each batch before working it more vigorously to get to the flowing magma stage.)
Line 2 baking trays with non-stick parchment paper (or silpat). You can stick it down with bits of batter in the four corners.
Fill a piping bag fitted with a 1cm round tip with the batter, and pipe even rounds of batter, about 3cm across, onto the tray. If you've mixed the batter properly, it should not spread flatly out too much (overmixed) or leave a peak (undermixed)
Let the batter dry for about 30 minutes. Preheat oven to 170 deg C (convection oven or 180 dec C if conventional oven).
When batter is dry to touch (it forms a slight crust), turn the oven down to 140 deg C (or 150 deg C for conventional oven) and bake shells for 14-15 min, turning the trays halfway through baking.
After baking, lift parchment onto wire rack to let shells cool and gently unmould when cool.
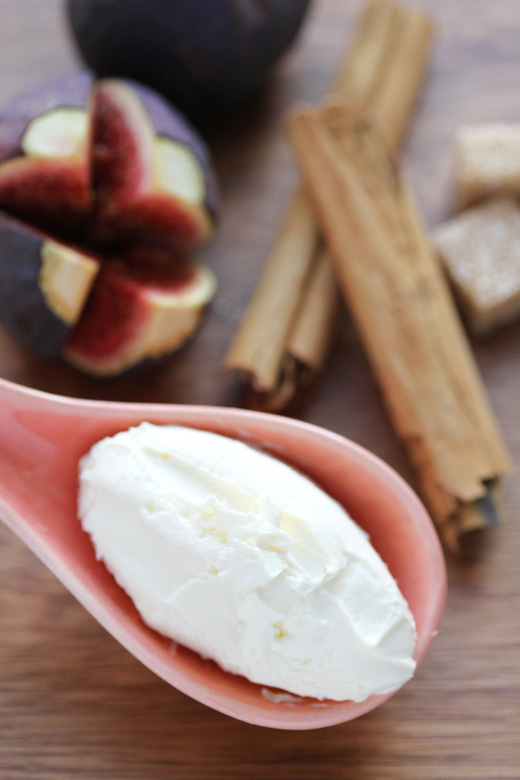
Fig & Mascarpone Cream Filling
6 ripe figs
3 tbsp brown sugar
40ml water
120g mascarpone cheese
50ml single cream
Quarter the figs and remove the skins.
Simmer the brown sugar, water and figs in a saucepan over medium to low heat, stirring occasionally and making sure it does not burn.
When the figs look like they have broken down, and the mixture is reduced to a thick almost jam-like consistency, take it off the heat and cool to room temperature.
Whisk the mascarpone cheese and cream together until stiff peaks.
Fold in the cooled fig jam into the cream.
Fill cream into piping bag fitted with 1cm round tip.
Assembly
Match pairs of shells of even size.
Pipe a small mound of cream filling onto one half of each pair of shells.
Top with the other shell.
Inspired by my recent trip to Marrakech and the wonderfully bright coloured decorative items such as lamps, glassware, carpets, ceramics etc, I decided to make macarons in various shades of pink and fill them with a fig and mascarpone cream. The styling for the photos were also inspired by the celebration of all things feminine so I decided to shoot the macarons as if they were precious gems in a jewellery collection. A little unusual, but I was pleased with the results. I'd like to think of these macarons as Jewels of Marrakech... I'm thinking of submitting some of my pics to Foodgawker or Tastespotting (never done so before!) but I've heard that it needs to cropped in a certain way, sharp, whitish, etc. This set of pics are pretty much close-up and composed for portrait orientation (as opposed to the square pics foodgawker looks for) so I might have to go search through my discarded shots. Anyway, in the meantime, it's all just for you guys!


I used my usual recipe for macarons, except that I divided the batter and coloured them 3 different shades of pink.
Macaron Shells (makes about 50-54 shells)
recipe adapted from Cannelle & Vanille
100g egg whites, aged
3g egg white powder
130g almond flour (blitz in food processor to get a finer texture)
160g icing sugar
55g castor sugar
pink gel food colouring
Sift icing sugar and processed almond flour together in a bowl. Set aside.
Mix egg whites with egg white powder and whisk in electric mixer until soft peaks on medium high speed.
Lower speed on electric mixer and add in castor sugar slowly while still whisking until fully incorporated. Continue whisking on medium high speed until your egg white meringue mixture reaches stiff peak stage.
Fold in 1/3 of dry ingredients (icing sugar + almond flour) into meringue with a spatula gently. Add in 1/3 more and fold again before mixing in the last 1/3 of the dry ingredients. Make sure all dry ingredients are incorporated into the meringue and start folding mixture more vigorously to form a shiny batter with the consistency of flowing magma or drips down like ribbons when you lift the batter up and let it drip down, and it should slowly disappear into itself without leaving a peak. Be careful not to over mix. If you are adding colour, add it just after all dry ingredients have been incorporated and before working the mixture into a shiny mass. (I divided the batter when the dry and wet ingredients were roughly incorporated, and then added food colouring to each batch before working it more vigorously to get to the flowing magma stage.)
Line 2 baking trays with non-stick parchment paper (or silpat). You can stick it down with bits of batter in the four corners.
Fill a piping bag fitted with a 1cm round tip with the batter, and pipe even rounds of batter, about 3cm across, onto the tray. If you've mixed the batter properly, it should not spread flatly out too much (overmixed) or leave a peak (undermixed)
Let the batter dry for about 30 minutes. Preheat oven to 170 deg C (convection oven or 180 dec C if conventional oven).
When batter is dry to touch (it forms a slight crust), turn the oven down to 140 deg C (or 150 deg C for conventional oven) and bake shells for 14-15 min, turning the trays halfway through baking.
After baking, lift parchment onto wire rack to let shells cool and gently unmould when cool.

Fig & Mascarpone Cream Filling
6 ripe figs
3 tbsp brown sugar
40ml water
120g mascarpone cheese
50ml single cream
Quarter the figs and remove the skins.
Simmer the brown sugar, water and figs in a saucepan over medium to low heat, stirring occasionally and making sure it does not burn.
When the figs look like they have broken down, and the mixture is reduced to a thick almost jam-like consistency, take it off the heat and cool to room temperature.
Whisk the mascarpone cheese and cream together until stiff peaks.
Fold in the cooled fig jam into the cream.
Fill cream into piping bag fitted with 1cm round tip.
Assembly
Match pairs of shells of even size.
Pipe a small mound of cream filling onto one half of each pair of shells.
Top with the other shell.
September 27, 2010
My Macaron Journey
Having looked at my Google Analytics recently, I realised that most of the search engine traffic was being referred to my blog as a result of people searching for macarons, especially lychee macarons to be specific :) In order to make it easier for people searching for macaron recipes, do's and don'ts, trial and errors, I shall compile the various macarons I've attempted below in this post.
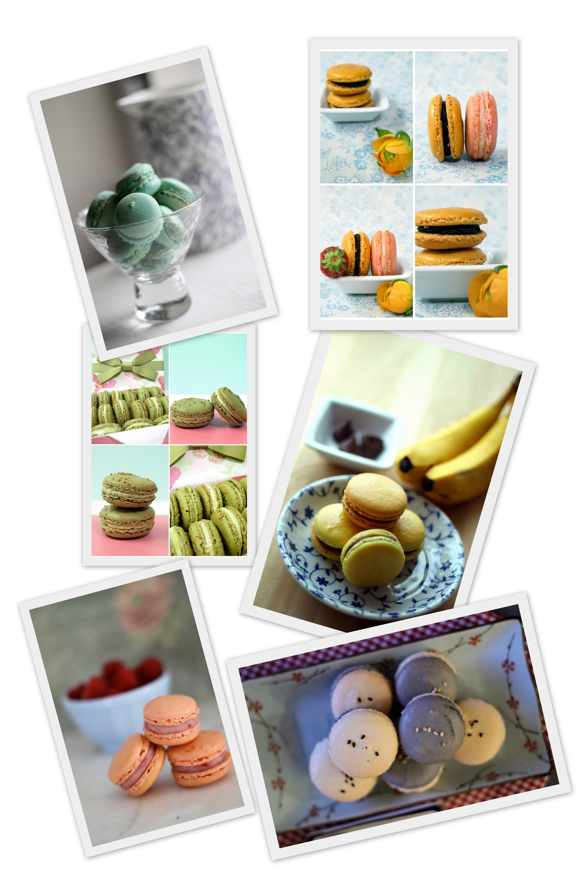
What an amazing journey this has been since I first embarked on making these colourful and pretty edible gems in end 2008. Gosh, it's been almost 2 years! From the humble beginning where I never knew if I could expect feet or not, to experimenting with flavours, textures, cooking times and whatnot till today, whilst I cannot boast to be a mac-guru but I am proud to proclaim that I am no longer intimidated by them temperamental macarons. Throughout this journey, I've met many like-minded mac-mad folks (these little things sure make one obsessed!) such as Jamie & Deeba who kindly host Mactweets Challenge monthly, which I sheepishly confess to not having taken part in a while now due to my laziness and busy work schedule, to Rachel over at The Pleasure Monger who's recently started her own mac-journey! I'm glad that the love of these little macs has united us in some way, and I hope that macarons continue to bring joy into the lives of those who look at, make and eat them!
- Black and White Sesame Macarons (with recipe for shells)
- Mango Mousse and Lychee Mousse Macarons
- Raspberry White Chocolate Macarons
- Pistachio Macarons
- Chewy or Moist Macarons? (discourse on texture of macarons)
- Macaron Failure (how not to do it)
- Chocolate Banana and White Chocolate Strawberry Macarons (trial and errors)
- Mango Buttercream and Black Sesame Cream Macarons I and II
- Chocolate Peanut Butter Banana Macarons
- The beginnings of my mac adventures - Kaya and Rose Macarons, Salted Caramel and Chocolate Macarons

What an amazing journey this has been since I first embarked on making these colourful and pretty edible gems in end 2008. Gosh, it's been almost 2 years! From the humble beginning where I never knew if I could expect feet or not, to experimenting with flavours, textures, cooking times and whatnot till today, whilst I cannot boast to be a mac-guru but I am proud to proclaim that I am no longer intimidated by them temperamental macarons. Throughout this journey, I've met many like-minded mac-mad folks (these little things sure make one obsessed!) such as Jamie & Deeba who kindly host Mactweets Challenge monthly, which I sheepishly confess to not having taken part in a while now due to my laziness and busy work schedule, to Rachel over at The Pleasure Monger who's recently started her own mac-journey! I'm glad that the love of these little macs has united us in some way, and I hope that macarons continue to bring joy into the lives of those who look at, make and eat them!
Labels:
macarons
September 20, 2010
Blogging Your Way
I've been taking this e-course called Blogging Your Way conducted by Holly of decor8 and Leslie of A Creative Mint on how to find your blogging voice, as well as many other tips and materials on how to publish a successful and attractive blog. It's been nothing short of inspiring, far surpassing my expectations. I had originally expected there to be lots of 'technical' how-to's like how to take good photos, style, creative post ideas, market yourself etc.
But it has been a lot more than that, nothing short of defining one's life goals and passions and how to bring that into your work and blog. It has forced me to think about what really drives me and what I would like to do with my life. Having recently read Eat, Pray, Love (I really want to watch the movie!), this question has been hanging over head and I've become all too acutely aware that I'm pretty lost. I have some inkling of what interests me - food, flowers, design, styling, weddings but how they all tie together, I'm not so sure. The question we had to answer as part of our homework for week 2 was what I can bring to the blogging world. To be honest, I'm not sure. I like to blog because it provides an outlet for me to share my inspiration, thoughts and finds on things that interest me with whoever cares to read. I like to post pretty pictures that I take, some of which allows me to practice my styling. I don't blog because I want to be a successful blogger. In fact, sometimes I'm too shy to let people know I have a blog, as I know I'm not focussed or doing this professionally enough. For me, I hope the blog will become a portfolio of my passions and talents, and perhaps one day I can make a living from that.
But whatever it is, the course has definitely helped me sharpen some of my thoughts and I really hope to implement some of the amazing things I'm learning right now in BYW. I've also met some great people, and discovered some great new blogs. We're only halfway through, and I can't wait for what we'll learn next! Stay tuned to a new lease of life for this blog soon!
Labels:
reflections
September 13, 2010
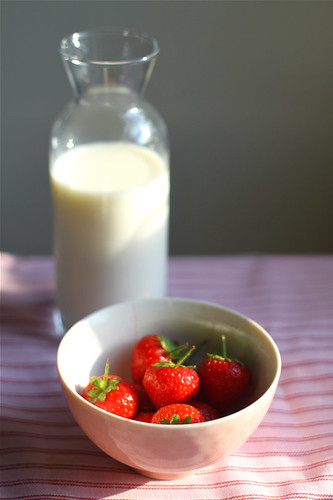
Strawberry Mousse & Panna Cotta Pots
I had some leftover strawberries that needed to be used, and so I decided to whip up something simple. In the end, this endeavour took more effort than I envisioned as I foolishly decided to whip the cream by hand instead of using my Kitchenaid. And why? All because I didn't feel like washing the big mixing bowl. Yes, it is indeed silly of me to expend all that energy whipping the cream instead of washing a bowl. I was clearly not thinking straight!
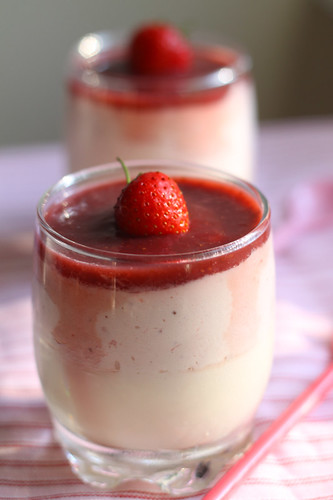
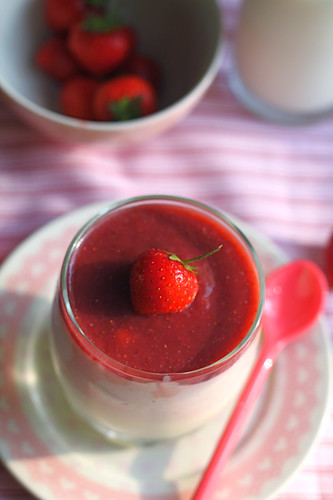
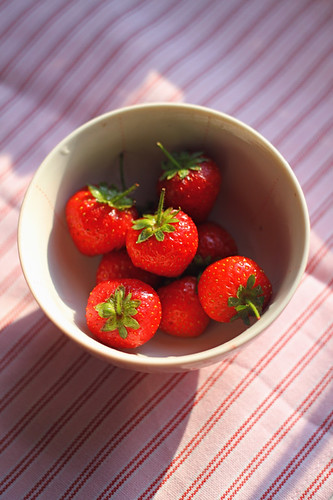
Strawberry Mouse & Panna Cotta Pots (makes 4)
Panna Cotta
200ml cream
100ml milk
45g sugar
3g gelatine powder
1 tsp water
Mix the gelatine powder with a tsp of cold water and let it bloom.
Bring the milk, cream and sugar to boil in saucepan. Turn off the heat once it starts to boil.
Add the gelatine and mix well, making sure it is all dissolved.
Cool down to room temperature, and then pour into pots/containers and leave in fridge to set.
Strawberry Mousse
150g strawberry puree
2g gelatine powder
200ml cream
30g sugar
1 tsp water
Mix the gelatine with the water and let it bloom.
Heat sugar with strawberry puree until sugar has melted. Add the gelatine to it and mix well until dissolved. Cool down to room temperature.
Whisk cream until stiff peaks. Fold in strawberry mixture until well mixed.
Spoon or pipe the strawberry mousse over the panna cotta and leave it in the fridge to set.
Strawberry Glaze
3 tbsp strawberry jam
50g strawberry puree
Heat up the strawberry jam with the puree until well mixed. Cool to room temperature and pour a thin layer over the top of each pot. Return to fridge to set.
August 29, 2010
New Covent Garden Flower Market
I finally made my way down to the New Covent Garden Flower Market yesterday morning. It's a wholesale market located at in Wandsworth just south of the river from Pimlico. Since it's meant for trade, it opens at 3am on weekdays, and 4am on Saturdays. I aimed to get there at 8am but only found myself at its doors at 9am. *sheepish look* By then, most of the vendors had packed up and only a handful of stalls were still open. Nonetheless, I still managed to score an armful (or rather a whole box) of flowers - hydrangeas, roses, calla lilies, ammi majus, eucalyptus etc. Arranged most of the flowers into a large display. I'll need to get some florist foam so I can do a more structured arrangement next time. Plus I have to wake up earlier!
Labels:
flowers
August 20, 2010
Beautiful and Yummy Finds
Been really behind in blogging lately, in fact, behind in everything! I find myself playing catch-up with my life due to work, visitors and an extended battle with the mice plaguing my apartment (YES very gross and icky but it's not cos of me!). Haven't posted anything, baked, arranged flowers for a long time, and even my laundry is piling up to the height of Everest! I do hope there are still a couple of readers out there checking back now and then, and I'll endeavour to be much more regular :P
As a kick-off to doing more regular short posts, I'd like to share with you these great inspiring finds. First up is a props rental company called Found. Now, props rental sound boring right (if you're not into styling)? Wrong. Jeni runs this amazing company that specialises in vintage props rental in California (I think) For someone who ought to belong to Props Addicts Anonymous, I'm really envious of her ability to turn her hobby into a business. Her collection of stuff is a treasure trove! Check out Jeni's blog here. Just see these amazing pics where Found provided the props.


The next amazing find is the above website where I discovered Found. Utterly Engaged is an e-magazine and website on weddings and they feature tons of inspiration and pretty things, with a focus on showcasing indie vendors and talents. I just love their style!
Lastly, this is something I hope to try when I'm next back in Singapore. 3 Inch Sin is a relatively new dessert cafe in Bukit Timah, Singapore that serves the ubiquitous chocolate fondant with various molten fillings. With flavours like peanut butter, mint, hazelnut, who can resist? My sister and bro-in-law are raving about it :) I dig the simple concept (one main product, many variations) as well as their colourful funky marketing. If anyone else has tried it, let me know!
As a kick-off to doing more regular short posts, I'd like to share with you these great inspiring finds. First up is a props rental company called Found. Now, props rental sound boring right (if you're not into styling)? Wrong. Jeni runs this amazing company that specialises in vintage props rental in California (I think) For someone who ought to belong to Props Addicts Anonymous, I'm really envious of her ability to turn her hobby into a business. Her collection of stuff is a treasure trove! Check out Jeni's blog here. Just see these amazing pics where Found provided the props.


Pictures from Utterly Engaged
The next amazing find is the above website where I discovered Found. Utterly Engaged is an e-magazine and website on weddings and they feature tons of inspiration and pretty things, with a focus on showcasing indie vendors and talents. I just love their style!
Lastly, this is something I hope to try when I'm next back in Singapore. 3 Inch Sin is a relatively new dessert cafe in Bukit Timah, Singapore that serves the ubiquitous chocolate fondant with various molten fillings. With flavours like peanut butter, mint, hazelnut, who can resist? My sister and bro-in-law are raving about it :) I dig the simple concept (one main product, many variations) as well as their colourful funky marketing. If anyone else has tried it, let me know!
Labels:
eats,
prettythings
July 1, 2010
Home-Made Japanese Meal
Having not cooked in a long time, and finally having a free evening tonight, I decided to make myself a Japanese meal. I was inspired by the wonderful dinner we had at Sake No Hana last night (where I saw Ralph Fiennes!!) where we had the always delicious Inaniwa udon with prawn tempura, prawn sashimi, sashimi with wasabi jelly, a lobster broth (that had lobster brains in it!), yellowtail and mooli stew, black cod rice, sukiyaki and sake chicken. Didn't take my camera with me so don't have any pictures to share.
But anyway, back to my dinner tonight, I had bought some udon and handmade tofu from Japan Centre, which I wanted to use up. The handmade tofu came in 3 individual packs, so I decided to make 3 different sauces for it. I also wanted to satisfy my craving for nasu dengaku (eggplant with miso paste) since we didn't order that yesterday, and of course a udon soup to go with the dishes. I flipped through my Harumi cookbooks to get some inspiration for the tofu and decided on a miso sauce (which would be the same as what I'm making for the aubergine), a honsen egg and soy broth, and my ready-made sesame dressing that I had gotten from Japan Centre (yes, it's cheating a little, but hey 3 difference sauces from scratch is a lot!).
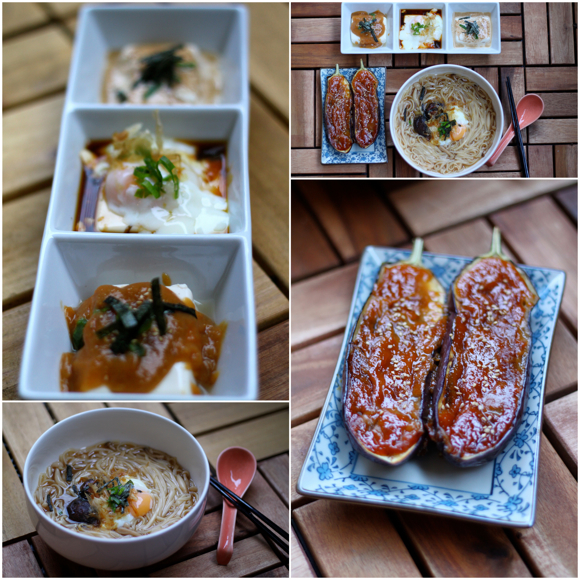
I definitely had way too much food again for one person :) so the recipes below are for 2 persons.
Nasu Dengaku (Eggplant with Miso Sauce)
1 eggplant
60ml dashi (see recipe at the end)
30ml sake
30ml mirin
2 tbsp sugar
1 tbsp cornflour
70g miso paste
Preheat oven to 200 deg C (convention oven)
Simmer the dashi, sake, mirin, cornflour and sugar in a saucepan until sugar is melted. Add in the miso paste and bring to boil. Once you see it start bubbling, take it off the heat.
Cut the eggplant into half and score it diagonally, making a grid-like pattern.
Heat 1 tsp of oil in a frying pan on medium heat and then place the 2 halves of eggplant face down. Turn it around after a few minutes, when you see it starting to soften and charring a little. Let it grill for a few minutes on the skin side as well.
Transfer the eggplant to foil-lined baking tray, skin-side down. Spoon the miso paste over each half and cover it well.
Bake in oven for about 15 minutes or when you see the miso paste turning brown and bubbling.
Honsen Egg & Soy Broth Tofu
1 small tofu
1 egg
2 tbsp soy sauce
1 tsbp of bonito flakes
1 tsp sake
1 tbsp mirin
To make the honsen egg: Place the egg (which shd be at room temperature, not chilled) into a heatproof container such as a teapot. Pour boiling water over it and cover. Let it stand for 10-12 minutes. This would give you a perfect soft boiled egg.
Mix soy sauce, sake, mirin and bonito flakes together and put it into microwave for 1 minute. Strain out the bonito flakes.
Make a small well in the tofu by scooping out some tofu onto the sides. Crack the honsen egg into the well. Pour the soy broth over it and garnish with spring onions and bonito flakes.
For the other 2 tofu, I basically just spooned over some miso paste as well as my ready made sesame dressing and garnished with some sesame seeds, spring onions and seaweed.
Udon with Mushroom Dashi Broth and Honsen Egg
1L of dashi (see recipe at the end)
2 bundles of udon noodles (dried thin ones, not the thick fat ones)
Assorted mushrooms (shitake, honshimeji)
4 tbsp of soy sauce or soy & kelp noodle seasoning
2 honsen eggs (according to recipe above)
Bring the dashi to boil in saucepan. Add udon and mushrooms in and bring it down to simmer.
When udon and mushrooms are cooked, add the soy sauce/seasoning to taste. Take it off the heat and dish into bowls for serving. Crack a honsen egg into each portion.
To serve, garnish with spring onions and seaweed.
Dashi Stock recipe
1.2L water
2 pieces 10x10cm dried kelp (konbu)
50g bonito flakes
Wash the konbu in running water to get rid of any salt deposits.
Place konbu in saucepan with 1.2L of water and let it soak for 30 min.
After 30 min, bring the water and konbu to boil. When the water boils, immediately take out the konbu.
Add in the bonito flakes and bring to boil again. Once it has boiled, turn off the heat and let the broth stand until the flakes have sank to the bottom.
Strain for use, or keep in container in fridge for future use. You may reuse the bonito flakes for a milder dashi stock.
But anyway, back to my dinner tonight, I had bought some udon and handmade tofu from Japan Centre, which I wanted to use up. The handmade tofu came in 3 individual packs, so I decided to make 3 different sauces for it. I also wanted to satisfy my craving for nasu dengaku (eggplant with miso paste) since we didn't order that yesterday, and of course a udon soup to go with the dishes. I flipped through my Harumi cookbooks to get some inspiration for the tofu and decided on a miso sauce (which would be the same as what I'm making for the aubergine), a honsen egg and soy broth, and my ready-made sesame dressing that I had gotten from Japan Centre (yes, it's cheating a little, but hey 3 difference sauces from scratch is a lot!).

I definitely had way too much food again for one person :) so the recipes below are for 2 persons.
Nasu Dengaku (Eggplant with Miso Sauce)
1 eggplant
60ml dashi (see recipe at the end)
30ml sake
30ml mirin
2 tbsp sugar
1 tbsp cornflour
70g miso paste
Preheat oven to 200 deg C (convention oven)
Simmer the dashi, sake, mirin, cornflour and sugar in a saucepan until sugar is melted. Add in the miso paste and bring to boil. Once you see it start bubbling, take it off the heat.
Cut the eggplant into half and score it diagonally, making a grid-like pattern.
Heat 1 tsp of oil in a frying pan on medium heat and then place the 2 halves of eggplant face down. Turn it around after a few minutes, when you see it starting to soften and charring a little. Let it grill for a few minutes on the skin side as well.
Transfer the eggplant to foil-lined baking tray, skin-side down. Spoon the miso paste over each half and cover it well.
Bake in oven for about 15 minutes or when you see the miso paste turning brown and bubbling.
Honsen Egg & Soy Broth Tofu
1 small tofu
1 egg
2 tbsp soy sauce
1 tsbp of bonito flakes
1 tsp sake
1 tbsp mirin
To make the honsen egg: Place the egg (which shd be at room temperature, not chilled) into a heatproof container such as a teapot. Pour boiling water over it and cover. Let it stand for 10-12 minutes. This would give you a perfect soft boiled egg.
Mix soy sauce, sake, mirin and bonito flakes together and put it into microwave for 1 minute. Strain out the bonito flakes.
Make a small well in the tofu by scooping out some tofu onto the sides. Crack the honsen egg into the well. Pour the soy broth over it and garnish with spring onions and bonito flakes.
For the other 2 tofu, I basically just spooned over some miso paste as well as my ready made sesame dressing and garnished with some sesame seeds, spring onions and seaweed.
Udon with Mushroom Dashi Broth and Honsen Egg
1L of dashi (see recipe at the end)
2 bundles of udon noodles (dried thin ones, not the thick fat ones)
Assorted mushrooms (shitake, honshimeji)
4 tbsp of soy sauce or soy & kelp noodle seasoning
2 honsen eggs (according to recipe above)
Bring the dashi to boil in saucepan. Add udon and mushrooms in and bring it down to simmer.
When udon and mushrooms are cooked, add the soy sauce/seasoning to taste. Take it off the heat and dish into bowls for serving. Crack a honsen egg into each portion.
To serve, garnish with spring onions and seaweed.
Dashi Stock recipe
1.2L water
2 pieces 10x10cm dried kelp (konbu)
50g bonito flakes
Wash the konbu in running water to get rid of any salt deposits.
Place konbu in saucepan with 1.2L of water and let it soak for 30 min.
After 30 min, bring the water and konbu to boil. When the water boils, immediately take out the konbu.
Add in the bonito flakes and bring to boil again. Once it has boiled, turn off the heat and let the broth stand until the flakes have sank to the bottom.
Strain for use, or keep in container in fridge for future use. You may reuse the bonito flakes for a milder dashi stock.
Le Manoir aux Quat' Saisons
I've been eating out quite a lot recently, no, make that all the time. Friends have been visiting, so we've been trying new places and revisiting tried and tested crowd pleasers like Lobster Noodles @ Mandarin Kitchen or Roast Duck @ Gold Mine at Bayswater. The return of Wan (for a short visit) also means that all the crazy eating that stopped half a year ago has restarted.
And so the Fat Duck gang got ourselves a reservation at Le Manoir to mark Wan's return. Together with another visiting friend, the 5 of us drove down to Oxford last Friday night in search of Raymond's house. We arrive in this quaint English village following Google's directions but just could not find it. Thinking that it's probably tucked away somewhere, we park the car and get off to ask for directions. Only then did we realise that Google had given us the WRONG DIRECTIONS! Lesson learnt in not treating Google as gospel truth. Luckily, the real location was just a short 10 minutes away in the neighbouring village of Great Milton.
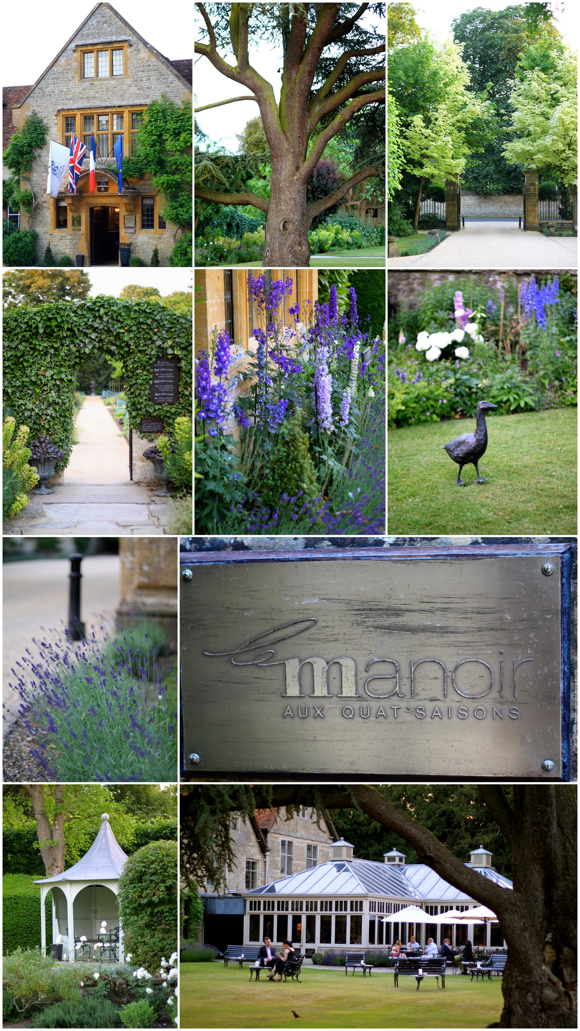
After the long arduous journey, we finally arrive at Le Manoir aux Quat'Saisons. It was beautiful. Words can't describe how pretty the gardens and grounds were so I'll let the pictures do the talking. Fortunately, it was still light when we arrived and it was nice to sit outside in the garden taking in the beauty. Yay to long summer days!
While we sat in the garden sipping our cocktails, they served us the amuse-bouches. They gave us 3 platters to share among 5 of us, which annoyed us a little. How were we to share since each platter consisted of different items? Minus points.
We moved indoors after we finished the amuse-bouches, where they sat us in a smallish drawing room adjacent to the main dining room (which looked really gorgeous). The place is set up like a house (if you couldn't already tell by the name) and is also a hotel if you so wish to stay over. Immediately as we walked in, we noticed this group of loud old Englishmen. The loudest among them seemed drunk, or even stoned as he slurred and struggled to string together sentences the entire night. They had very posh accents and looked like the sort who were rich and didn't work a day in their lives. Their conversation provided for our 'entertainment' throughout dinner, gems such as "I won't call her a prostitute BUT....", "She is very well-connected, with ministers and the Taliban", "I put to you that there is no evidence that the Silk Route existed", "I'm a retired womaniser" kept us highly amused and a little annoyed (seeing how 4 out of 5 of us were chinese and they were denying the existence of the Silk Route?!). We always do seem to get seated next to weirdos at posh restaurants (cf precocious Eton boy at Fat Duck).
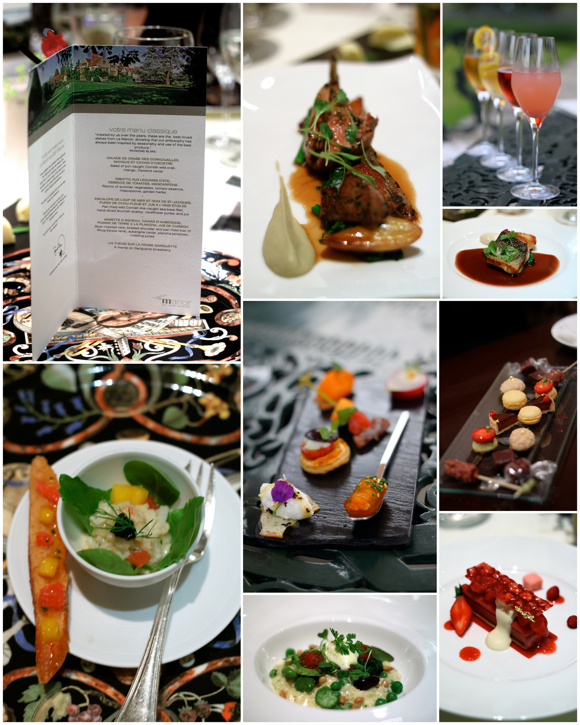
As for the food, we chose the Menu Classique as we figured those would be the all-time favourites as opposed to seasonal experimentations in the Menu Decouverte. The first course was a Salad of Cornish wild crab with mango and caviar. I wasn't all that impressed by this dish as it tasted like, well, a crab salad. This was followed by a Risotto of summer vegetables, tomato essence and mascarpone. Now this dish was outstanding. While a risotto might not be all that special, you could taste the freshness of the peas, beans, tomatoes with bite of creamy goodness. I also loved the toasted pine nuts that added that extra crunch and helped cut the cream and cheese.
The first main course was a pan-fried Cornish sea bass, served with a hand-dived scallop, cauliflower puree and star anise jus. The fish was perfectly cooked, as was the scallop and the whole dish was vaguely familiar as there were many elements of Asian cooking (bok choy, star anise, ginger, soy). The star anise jus was surprisingly not overpowering and managed to pull together the dish. The second main was a trio of slow-roasted rack, braised shoulder and pan-fried liver of lamb, with aubergine acavier, plancha potatoes and roasting juices. I'm not usually a big fan of lamb but the slow-roasted rack was melt-in-your-mouth goodness and the braised shoulder had a lot of flavour as well. Liver's not really my thing, and so I left it although the rest said it was overcooked anyway.
The dessert was another star, simply named A theme on the Gariguette strawberry, it was a play on various textures and forms of strawberry desserts. There was a gelee, a sorbet, a cream, confit, puree, caramel, marshmallow and of course both big and small wild strawberries. It was a refreshing and delightful end to the meal. We also had coffee, tea, hot chocolate plus petit fours in the lounge area (to escape from the loud crazy old men) after the meal and went back to London very well-fed and happily drunk (for the rest who did wine pairings) in the wee hours of the morning. Overall, a satisfying meal though I think the mains could have been a little more wow. The surroundings were beautiful and I can imagine it being the setting of a really romantic evening or even wedding (as long as you don't have drunk old men spoiling your evening) on a beautiful day.
Le Manoir aux Quat' Saisons
Church Road, Great Milton
Oxford, OX44 7PD, England
Tel: +44 (0)1844 278881
And so the Fat Duck gang got ourselves a reservation at Le Manoir to mark Wan's return. Together with another visiting friend, the 5 of us drove down to Oxford last Friday night in search of Raymond's house. We arrive in this quaint English village following Google's directions but just could not find it. Thinking that it's probably tucked away somewhere, we park the car and get off to ask for directions. Only then did we realise that Google had given us the WRONG DIRECTIONS! Lesson learnt in not treating Google as gospel truth. Luckily, the real location was just a short 10 minutes away in the neighbouring village of Great Milton.
After the long arduous journey, we finally arrive at Le Manoir aux Quat'Saisons. It was beautiful. Words can't describe how pretty the gardens and grounds were so I'll let the pictures do the talking. Fortunately, it was still light when we arrived and it was nice to sit outside in the garden taking in the beauty. Yay to long summer days!

While we sat in the garden sipping our cocktails, they served us the amuse-bouches. They gave us 3 platters to share among 5 of us, which annoyed us a little. How were we to share since each platter consisted of different items? Minus points.

We moved indoors after we finished the amuse-bouches, where they sat us in a smallish drawing room adjacent to the main dining room (which looked really gorgeous). The place is set up like a house (if you couldn't already tell by the name) and is also a hotel if you so wish to stay over. Immediately as we walked in, we noticed this group of loud old Englishmen. The loudest among them seemed drunk, or even stoned as he slurred and struggled to string together sentences the entire night. They had very posh accents and looked like the sort who were rich and didn't work a day in their lives. Their conversation provided for our 'entertainment' throughout dinner, gems such as "I won't call her a prostitute BUT....", "She is very well-connected, with ministers and the Taliban", "I put to you that there is no evidence that the Silk Route existed", "I'm a retired womaniser" kept us highly amused and a little annoyed (seeing how 4 out of 5 of us were chinese and they were denying the existence of the Silk Route?!). We always do seem to get seated next to weirdos at posh restaurants (cf precocious Eton boy at Fat Duck).
As for the food, we chose the Menu Classique as we figured those would be the all-time favourites as opposed to seasonal experimentations in the Menu Decouverte. The first course was a Salad of Cornish wild crab with mango and caviar. I wasn't all that impressed by this dish as it tasted like, well, a crab salad. This was followed by a Risotto of summer vegetables, tomato essence and mascarpone. Now this dish was outstanding. While a risotto might not be all that special, you could taste the freshness of the peas, beans, tomatoes with bite of creamy goodness. I also loved the toasted pine nuts that added that extra crunch and helped cut the cream and cheese.
The first main course was a pan-fried Cornish sea bass, served with a hand-dived scallop, cauliflower puree and star anise jus. The fish was perfectly cooked, as was the scallop and the whole dish was vaguely familiar as there were many elements of Asian cooking (bok choy, star anise, ginger, soy). The star anise jus was surprisingly not overpowering and managed to pull together the dish. The second main was a trio of slow-roasted rack, braised shoulder and pan-fried liver of lamb, with aubergine acavier, plancha potatoes and roasting juices. I'm not usually a big fan of lamb but the slow-roasted rack was melt-in-your-mouth goodness and the braised shoulder had a lot of flavour as well. Liver's not really my thing, and so I left it although the rest said it was overcooked anyway.
The dessert was another star, simply named A theme on the Gariguette strawberry, it was a play on various textures and forms of strawberry desserts. There was a gelee, a sorbet, a cream, confit, puree, caramel, marshmallow and of course both big and small wild strawberries. It was a refreshing and delightful end to the meal. We also had coffee, tea, hot chocolate plus petit fours in the lounge area (to escape from the loud crazy old men) after the meal and went back to London very well-fed and happily drunk (for the rest who did wine pairings) in the wee hours of the morning. Overall, a satisfying meal though I think the mains could have been a little more wow. The surroundings were beautiful and I can imagine it being the setting of a really romantic evening or even wedding (as long as you don't have drunk old men spoiling your evening) on a beautiful day.
Le Manoir aux Quat' Saisons
Church Road, Great Milton
Oxford, OX44 7PD, England
Tel: +44 (0)1844 278881
June 16, 2010
Truffs & Friends
Two of my friends from Singapore, EL and JL, came to London recently and bunked in chez moi. The thing we all have in common is the love of food (as with most of my friends!) and one of them has taken this passion further and opened his own chocolate atelier, Truffs, in Singapore. In this cosy open kitchen, he makes and serves only 2 products - hand-rolled truffles (4 varieties - 55%, 66%, 70% and a sugarless one) and a chocolate cake. Talk about specialising!
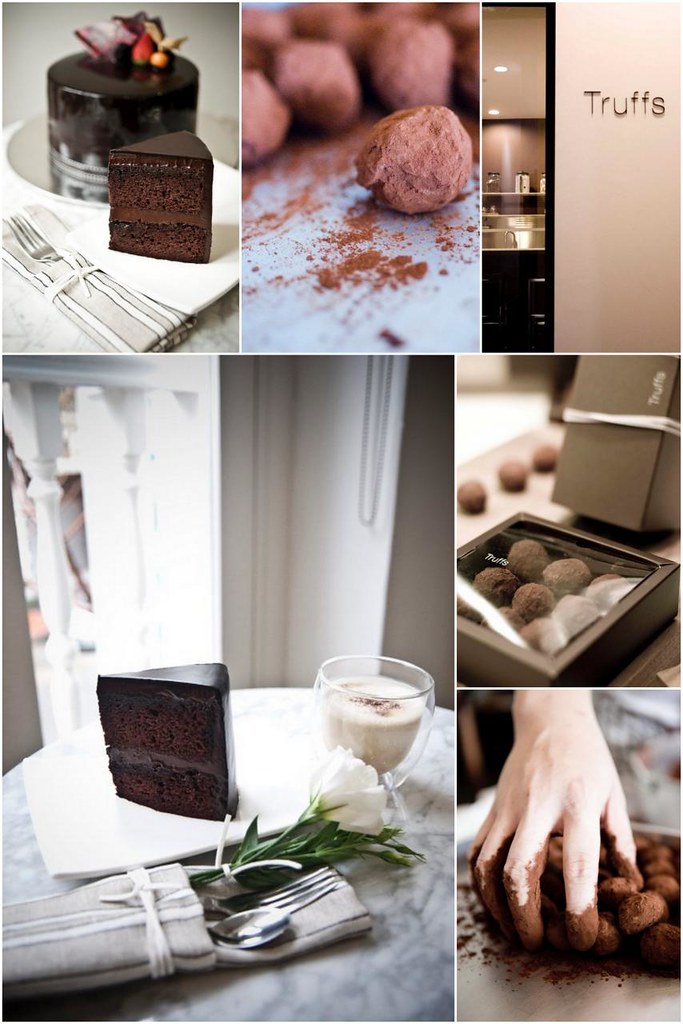
I do attest to the quality of the truffles and you have to try one for yourself to know. Unfortunately, they are only available in Singapore at the moment though I've been trying to persuade him to open Truffs London hah! The chocolate cake is also amazingly moist, dense and chocolatey. Don't take my word for it, since I'm a friend (though I have no shares in the business!) but there have been several reviews posted in the Singaporean blogsphere and magazines, latest being a hilarious one from Mr Brown (you may not fully appreciate it if you don't understand Singlish, the colloquial English spoken in Singapore). TimeOut Singapore has also voted Truffs' Chocolate Cake as Top 5 in Singapore. If you're in Singapore, do check Truffs out. They're located on the 2nd floor of a shophouse at 79a Telok Ayer Street, Singapore 068627.
So while EL and JL were here, we went along to William Curley, apparently Britain's Best Chocolatier 2007-2009, for a class in chocolates and ice cream. We made sea salt caramel pralines, vanilla and chocolate ice-creams (using a pacojet!!). As it was just the 3 of us, it was really personalised with Suzy the pastry chef entertaining our many questions about ice-creams and chocs. I would highly recommend their classes, although I'm not too sure if they regularly conduct classes at the Belgravia branch (which is where we went to) instead of the Richmond branch. Check their website for more details.
We also dined at Viajante, a new restaurant located in the newly converted Bethnal Green Townhall Hotel. I will put up a separate review with pictures another time, unless C beats me to it :) but suffice to say that the four foodies weren't wowed by the food nor service, and the second half of the meal dragged on needlessly, especially after the chef owner Nuno Mendes left. Hopefully it's because they're still in soft opening stage, and they get their act together as it is quite different expectations hosting supper clubs (as Chef Mendes was doing prior to this venture) and serving paying guests in a high-end restaurant environment.
To send them off in style, as well as to mark a special appearance by Wan on his quick stopover en route to South Africa, we had a massive dinner of roast pork from Tang Freres (siu yoke), specially hand carried back from Paris by EL, roast duck from Four Seasons here in London and sambal kangkong, all washed down with Pimms!
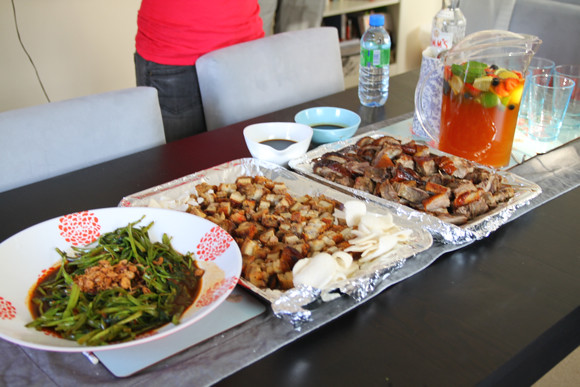
The roast pork from Tang Freres/Tang Gourmet is my absolute favourite and possibly best roast pork in the world! I was in Paris the week before and was completely devastated when Tang Gourmet ran out of roast pork when we went in the evening. They sell it both at their main supermarket takeout counter at 48 Avenue d'Ivry and Tang Gourmet deli along Avenue de Choisy, right outside of Place d'Italie metro stop. Try to get there in the afternoon, or it'll be sold out!
It was a decadent couple of weeks of eating as we had cakes after cakes, ice-creams after ice-creams, chocolates after chocolates. I guess that's what happens if you hang out with chefy foodie types :) At one point, we had 8 different cakes in a day and on another, 8 different ice-creams sitting in my fridge. Now that they're gone, who's going to help me finish all the leftovers??

Photos are courtesy of Truffs, from their Facebook Fan Page
I do attest to the quality of the truffles and you have to try one for yourself to know. Unfortunately, they are only available in Singapore at the moment though I've been trying to persuade him to open Truffs London hah! The chocolate cake is also amazingly moist, dense and chocolatey. Don't take my word for it, since I'm a friend (though I have no shares in the business!) but there have been several reviews posted in the Singaporean blogsphere and magazines, latest being a hilarious one from Mr Brown (you may not fully appreciate it if you don't understand Singlish, the colloquial English spoken in Singapore). TimeOut Singapore has also voted Truffs' Chocolate Cake as Top 5 in Singapore. If you're in Singapore, do check Truffs out. They're located on the 2nd floor of a shophouse at 79a Telok Ayer Street, Singapore 068627.
So while EL and JL were here, we went along to William Curley, apparently Britain's Best Chocolatier 2007-2009, for a class in chocolates and ice cream. We made sea salt caramel pralines, vanilla and chocolate ice-creams (using a pacojet!!). As it was just the 3 of us, it was really personalised with Suzy the pastry chef entertaining our many questions about ice-creams and chocs. I would highly recommend their classes, although I'm not too sure if they regularly conduct classes at the Belgravia branch (which is where we went to) instead of the Richmond branch. Check their website for more details.
We also dined at Viajante, a new restaurant located in the newly converted Bethnal Green Townhall Hotel. I will put up a separate review with pictures another time, unless C beats me to it :) but suffice to say that the four foodies weren't wowed by the food nor service, and the second half of the meal dragged on needlessly, especially after the chef owner Nuno Mendes left. Hopefully it's because they're still in soft opening stage, and they get their act together as it is quite different expectations hosting supper clubs (as Chef Mendes was doing prior to this venture) and serving paying guests in a high-end restaurant environment.
To send them off in style, as well as to mark a special appearance by Wan on his quick stopover en route to South Africa, we had a massive dinner of roast pork from Tang Freres (siu yoke), specially hand carried back from Paris by EL, roast duck from Four Seasons here in London and sambal kangkong, all washed down with Pimms!

The roast pork from Tang Freres/Tang Gourmet is my absolute favourite and possibly best roast pork in the world! I was in Paris the week before and was completely devastated when Tang Gourmet ran out of roast pork when we went in the evening. They sell it both at their main supermarket takeout counter at 48 Avenue d'Ivry and Tang Gourmet deli along Avenue de Choisy, right outside of Place d'Italie metro stop. Try to get there in the afternoon, or it'll be sold out!
It was a decadent couple of weeks of eating as we had cakes after cakes, ice-creams after ice-creams, chocolates after chocolates. I guess that's what happens if you hang out with chefy foodie types :) At one point, we had 8 different cakes in a day and on another, 8 different ice-creams sitting in my fridge. Now that they're gone, who's going to help me finish all the leftovers??
June 12, 2010
Mactweets Mac Attack 8 Challenge! - Black & White Sesame Macarons
After missing the last few rounds of Mac Attack challenges, I am finally back! Thanks to Jamie of Lifesafeast, who reminded me this month's challenge was due this week when I met her at last weekend's Food Bloggers Connect (more on that soon I promise!), I am back with a vengeance!
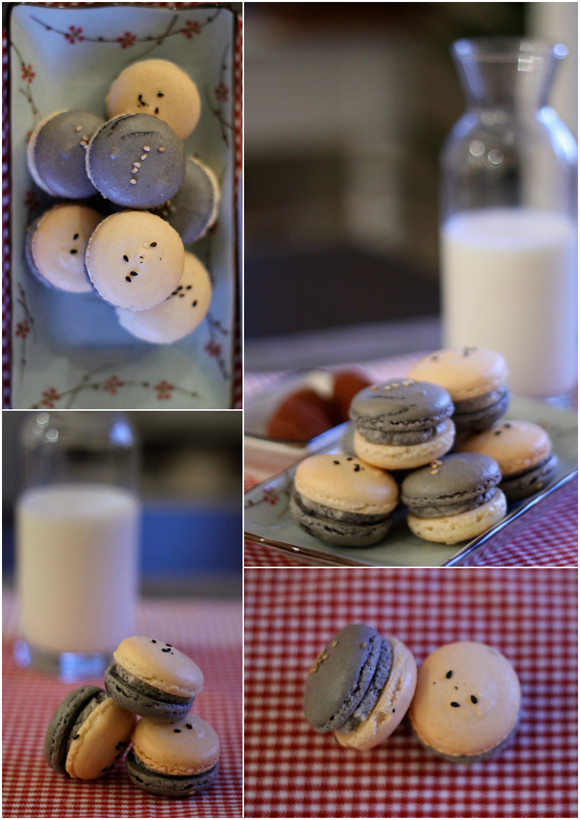
This month's theme is "Take A Walk on The Wild Side", macarons inspired by Africa and the safari. The first thing that sprung to my mind when I thought about the theme was zebras. Don't ask me why but somehow that's the first animal that popped up in my head :) And since this month the World Cup kicks off in South Africa, I thought I'd make black & white macarons, inspired by both zebras and footballs! Other than the colours, I picked sesame as a flavour as it comes both in black and white variations and I love black sesame anything.
I made the shells using the tried and trusted recipe adapted from Cannelle et Vanille's basic recipe,
colouring half the shells with black colouring (though it didn't really come out very black) and left the other half au naturel. While they were drying, I sprinkled some black sesame seeds on the white shells and white sesame seeds on the dark shells. As for the filling, I whipped up a creme chantilly and flavoured it with black sesame paste (see recipe below).
Macaron Shells (makes about 50-54 shells)
recipe adapted from Cannelle & Vanille
100g egg whites, aged
3g egg white powder
130g almond flour (blitz in food processor to get a finer texture)
160g icing sugar
55g castor sugar
black gel food colouring (according to how dark you want it, I put about 1/4 tsp)
1 tsp black sesame seeds
1 tsp white sesame seeds
Sift icing sugar and processed almond flour together in a bowl. Set aside.
Mix egg whites with egg white powder and whisk in electric mixer until soft peaks on medium high speed.
Lower speed on electric mixer and add in castor sugar slowly while still whisking until fully incorporated. Continue whisking on medium high speed until your egg white meringue mixture reaches stiff peak stage.
Fold in 1/3 of dry ingredients (icing sugar + almond flour) into meringue with a spatula gently. Add in 1/3 more and fold again before mixing in the last 1/3 of the dry ingredients. Make sure all dry ingredients are incorporated into the meringue and start folding mixture more vigorously to form a shiny batter with the consistency of flowing magma or drips down like ribbons when you lift the batter up and let it drip down, and it should slowly disappear into itself without leaving a peak. Be careful not to over mix. If you are adding colour, add it just after all dry ingredients have been incorporated and before working the mixture into a shiny mass.
Line 2 baking trays with non-stick parchment paper (or silpat). You can stick it down with bits of batter in the four corners.
Fill a piping bag fitted with a 1cm round tip with the batter, and pipe even rounds of batter, about 3cm across, onto the tray. If you've mixed the batter properly, it should not spread flatly out too much (overmixed) or leave a peak (undermixed). Sprinkle sesame seeds on top of shells.
Let the batter dry for about 30 minutes. Preheat oven to 170 deg C (convection oven or 180 dec C if conventional oven).
When batter is dry to touch (it forms a slight crust), turn the oven down to 140 deg C (or 150 deg C for conventional oven) and bake shells for 14-15 min, turning the trays halfway through baking.
After baking, lift parchment onto wire rack to let shells cool and gently unmould when cool.
Black Sesame Cream Filling
200ml whipping cream
20g icing sugar
20g black sesame paste (available from japanese grocery stores)
Whisk whipping cream in electric mixer on medium high speed until almost stiff, taking care not to overwhip.
Sift icing sugar over whipped cream and continue whisking to incorporate, until cream is stiff.
Fold in black sesame paste with a spatula until evenly incorporated.
Fill cream into piping bag fitted with 1cm round tip.
Assembly
Match pairs of shells of even size.
Pipe a small mound of cream filling onto one half of each pair of shells.
Top with the other shell.
So there you go, my entry for Mac Attack 8!
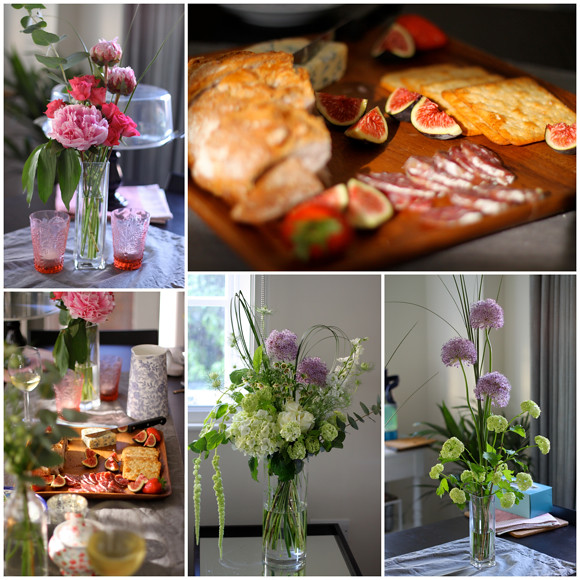
Also wanted to share some other pictures I took the other day when the girls came over for a girly sleepover. I was very inspired by the flowers I saw on my way home, and spent wayyyy too much than my usual flower budget on many different types of flowers. Arranged them into several different designs and decorated the house with them. We also went to Borough Market and bought saucisson, cheese and fruits for a pre-dinner snack, accompanied by some lovely Gewurztraminer. I do miss doing flowers, really need to practice more often, though it's not a cheap hobby!
This month's theme is "Take A Walk on The Wild Side", macarons inspired by Africa and the safari. The first thing that sprung to my mind when I thought about the theme was zebras. Don't ask me why but somehow that's the first animal that popped up in my head :) And since this month the World Cup kicks off in South Africa, I thought I'd make black & white macarons, inspired by both zebras and footballs! Other than the colours, I picked sesame as a flavour as it comes both in black and white variations and I love black sesame anything.
I made the shells using the tried and trusted recipe adapted from Cannelle et Vanille's basic recipe,
colouring half the shells with black colouring (though it didn't really come out very black) and left the other half au naturel. While they were drying, I sprinkled some black sesame seeds on the white shells and white sesame seeds on the dark shells. As for the filling, I whipped up a creme chantilly and flavoured it with black sesame paste (see recipe below).

Macaron Shells (makes about 50-54 shells)
recipe adapted from Cannelle & Vanille
100g egg whites, aged
3g egg white powder
130g almond flour (blitz in food processor to get a finer texture)
160g icing sugar
55g castor sugar
black gel food colouring (according to how dark you want it, I put about 1/4 tsp)
1 tsp black sesame seeds
1 tsp white sesame seeds
Sift icing sugar and processed almond flour together in a bowl. Set aside.
Mix egg whites with egg white powder and whisk in electric mixer until soft peaks on medium high speed.
Lower speed on electric mixer and add in castor sugar slowly while still whisking until fully incorporated. Continue whisking on medium high speed until your egg white meringue mixture reaches stiff peak stage.
Fold in 1/3 of dry ingredients (icing sugar + almond flour) into meringue with a spatula gently. Add in 1/3 more and fold again before mixing in the last 1/3 of the dry ingredients. Make sure all dry ingredients are incorporated into the meringue and start folding mixture more vigorously to form a shiny batter with the consistency of flowing magma or drips down like ribbons when you lift the batter up and let it drip down, and it should slowly disappear into itself without leaving a peak. Be careful not to over mix. If you are adding colour, add it just after all dry ingredients have been incorporated and before working the mixture into a shiny mass.
Line 2 baking trays with non-stick parchment paper (or silpat). You can stick it down with bits of batter in the four corners.
Fill a piping bag fitted with a 1cm round tip with the batter, and pipe even rounds of batter, about 3cm across, onto the tray. If you've mixed the batter properly, it should not spread flatly out too much (overmixed) or leave a peak (undermixed). Sprinkle sesame seeds on top of shells.
Let the batter dry for about 30 minutes. Preheat oven to 170 deg C (convection oven or 180 dec C if conventional oven).
When batter is dry to touch (it forms a slight crust), turn the oven down to 140 deg C (or 150 deg C for conventional oven) and bake shells for 14-15 min, turning the trays halfway through baking.
After baking, lift parchment onto wire rack to let shells cool and gently unmould when cool.
Black Sesame Cream Filling
200ml whipping cream
20g icing sugar
20g black sesame paste (available from japanese grocery stores)
Whisk whipping cream in electric mixer on medium high speed until almost stiff, taking care not to overwhip.
Sift icing sugar over whipped cream and continue whisking to incorporate, until cream is stiff.
Fold in black sesame paste with a spatula until evenly incorporated.
Fill cream into piping bag fitted with 1cm round tip.
Assembly
Match pairs of shells of even size.
Pipe a small mound of cream filling onto one half of each pair of shells.
Top with the other shell.
So there you go, my entry for Mac Attack 8!
Also wanted to share some other pictures I took the other day when the girls came over for a girly sleepover. I was very inspired by the flowers I saw on my way home, and spent wayyyy too much than my usual flower budget on many different types of flowers. Arranged them into several different designs and decorated the house with them. We also went to Borough Market and bought saucisson, cheese and fruits for a pre-dinner snack, accompanied by some lovely Gewurztraminer. I do miss doing flowers, really need to practice more often, though it's not a cheap hobby!

Labels:
flowers,
macarons,
prettythings
June 8, 2010
iPhone 4 - DROOL....
Watch this and drool - I really want a new iPhone! Ok, will probably just be contented with the OS upgrade. Can't wait!!
April 27, 2010
World's 50 Best Restaurants and My Trip to Jaan par André
I was really excited to be invited to the San Pelligrino's World's Best 50 Restaurants Awards tonight (am still buzzing from the high!), imagine being in the same room as all those amazing chefs and restaurateurs! The evening began with cocktails and canapes, after which we were ushered into the main gallery at Guildhall for the awards. I spotted a few chefs that I recognised but obviously didn't have the guts to go up and ask for a picture. I did snap a hazy shot of Heston though :)


The awards started with the Breakthrough Restaurant, which is basically a restaurant that the judges think will break into the top 50 within the next few years. This was won by Marque Restaurant in Sydney. Thereafter, it was a descending countdown of the Top 50. The presenter did it pretty quickly, announcing the position, followed by the restaurant and the corresponding introduction. If the chef was around, they'd come up and collect the award. The top 10 restaurants are as follows (the full list can be found here):
#10 - Per Se (US)
# 9 - Arzak (Spain)
# 8 - Daniel (US)
# 7 - Alinea (US)
# 6 - Osteria Francescana (Italy)
# 5 - Mugaritz (Spain)
# 4 - El Cella de Can Roca (Spain)
# 3 - The Fat Duck (UK)
# 2 - El Bulli (Spain)
# 1 - Noma (Denmark)
I think the big upset this year was that El Bulli and Fat Duck have been surpassed by Noma. I had first heard about Noma during my Copenhagen trip last month. Everyone was raving about how amazing the food was, and how hard it was to get a table. Now I know why :) and this will be a place that I've gotta somehow make a pilgrimage to in the time I'm here.
I'm really proud that 2 Singaporean restaurants made it into the top 50 list this year. Iggy's of course had broke into the top 50 last year and this year, climbed 17 places up #28! This year also saw Jaan par André make a debut at #39, which is a great achievement for a relatively new (2 or 3 yr old?) restaurant! I ate there back in February and I instinctively knew that it was better than some of the Michelin-starred restaurants I had eaten at and it deserved to be recognised and given Michelin accolades when they roll into town (one day, hopefully soon). I'm so happy that Chef André Chiang's talent has been affirmed. In honour of the award, I'm finally posting up my pics of my meal at Jaan par André as I've been a lazy arse and faffing about since February.
We had the set lunch, which was a prix fixe menu where you get to pick a starter, main and dessert from a few choices. It was only S$58++ (which is like £25??) and great value for money in my opinion.
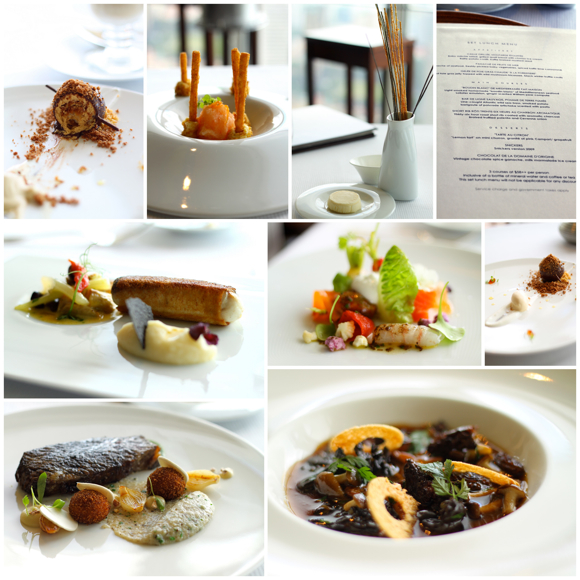
The food was amazing, I'd dare say the best meal I've had in Singapore and even better than some of the Michelin starred restaurants here in Europe. We were served these thin sticks of bread, as well as oven-dry roasted chicken skin (yummmm) before our meal began. I had the Gelée de Foie Gras Chaude à la Forestiere, which was a foie gras jelly topped with wild mushrooms and truffle coulis for my starter. The flavours were so intense and powerful, it left you wanting more as I ate up that small portion hungrily. And what can go wrong with foie gras and truffles right? My friend had the Panache of Fruits de Mer, which was a beautifully crafted dish that looked almost too pretty to eat!
Next I had the 36-hour roast short rib, served with truffled polenta and onion. Absolutely melt-in-your-mouth as you would expect from a slow-cooked cut of meat. Perfect texture and great flavour again. My friend had the sea bass, which was rolled up for an interesting presentation and was also perfectly cooked. For dessert, I went for the Snickers bar reconstructed, which was a ball of caramel and chocolate mousse, coated in chocolate and served with peanut sand and root beer jelly (if I don't remember wrongly!). It was a fun and creative interpretation of a classic candy bar, not to mention delicious. My friend had the lemon tart, served mini churros and grapefruit granite, which was more refreshing than mine. I think the Chef André's strengths is in his ability to bring out the natural flavours of his ingredients and to combine them in a way that enhances it manifold.
It was a great experience and I remember thinking I need to go back again some time to try the dinner menu. Since it's my birthday next week and my friends had been asking where I'd like to celebrate it, I think I have the answer! It was awesome meeting Iggy and Chef André tonight, as well as the great Daniel Boulud who's opening a new restaurant Bar Boulud here in London, and a Daniel in Marina Bay Sands in Singapore. By the end of the year, there'd be so many more new restaurants to try in Singapore. Plus Chef André will be starting his own new restaurant, can't wait! Iggy's will also be relocating to Hilton. Will have somehow get myself on a trip back in order to check out these new place!
Anyway, congrats also to Gunther's (#84) and Les Amis (#78), well done!! 4 Singaporean restaurants in Top 100, with 2 in Top 50 (which is the same as Japan and Australia!) is not too shabby at all!


The awards started with the Breakthrough Restaurant, which is basically a restaurant that the judges think will break into the top 50 within the next few years. This was won by Marque Restaurant in Sydney. Thereafter, it was a descending countdown of the Top 50. The presenter did it pretty quickly, announcing the position, followed by the restaurant and the corresponding introduction. If the chef was around, they'd come up and collect the award. The top 10 restaurants are as follows (the full list can be found here):
#10 - Per Se (US)
# 9 - Arzak (Spain)
# 8 - Daniel (US)
# 7 - Alinea (US)
# 6 - Osteria Francescana (Italy)
# 5 - Mugaritz (Spain)
# 4 - El Cella de Can Roca (Spain)
# 3 - The Fat Duck (UK)
# 2 - El Bulli (Spain)
# 1 - Noma (Denmark)
I think the big upset this year was that El Bulli and Fat Duck have been surpassed by Noma. I had first heard about Noma during my Copenhagen trip last month. Everyone was raving about how amazing the food was, and how hard it was to get a table. Now I know why :) and this will be a place that I've gotta somehow make a pilgrimage to in the time I'm here.
I'm really proud that 2 Singaporean restaurants made it into the top 50 list this year. Iggy's of course had broke into the top 50 last year and this year, climbed 17 places up #28! This year also saw Jaan par André make a debut at #39, which is a great achievement for a relatively new (2 or 3 yr old?) restaurant! I ate there back in February and I instinctively knew that it was better than some of the Michelin-starred restaurants I had eaten at and it deserved to be recognised and given Michelin accolades when they roll into town (one day, hopefully soon). I'm so happy that Chef André Chiang's talent has been affirmed. In honour of the award, I'm finally posting up my pics of my meal at Jaan par André as I've been a lazy arse and faffing about since February.
We had the set lunch, which was a prix fixe menu where you get to pick a starter, main and dessert from a few choices. It was only S$58++ (which is like £25??) and great value for money in my opinion.

The food was amazing, I'd dare say the best meal I've had in Singapore and even better than some of the Michelin starred restaurants here in Europe. We were served these thin sticks of bread, as well as oven-dry roasted chicken skin (yummmm) before our meal began. I had the Gelée de Foie Gras Chaude à la Forestiere, which was a foie gras jelly topped with wild mushrooms and truffle coulis for my starter. The flavours were so intense and powerful, it left you wanting more as I ate up that small portion hungrily. And what can go wrong with foie gras and truffles right? My friend had the Panache of Fruits de Mer, which was a beautifully crafted dish that looked almost too pretty to eat!
Next I had the 36-hour roast short rib, served with truffled polenta and onion. Absolutely melt-in-your-mouth as you would expect from a slow-cooked cut of meat. Perfect texture and great flavour again. My friend had the sea bass, which was rolled up for an interesting presentation and was also perfectly cooked. For dessert, I went for the Snickers bar reconstructed, which was a ball of caramel and chocolate mousse, coated in chocolate and served with peanut sand and root beer jelly (if I don't remember wrongly!). It was a fun and creative interpretation of a classic candy bar, not to mention delicious. My friend had the lemon tart, served mini churros and grapefruit granite, which was more refreshing than mine. I think the Chef André's strengths is in his ability to bring out the natural flavours of his ingredients and to combine them in a way that enhances it manifold.
It was a great experience and I remember thinking I need to go back again some time to try the dinner menu. Since it's my birthday next week and my friends had been asking where I'd like to celebrate it, I think I have the answer! It was awesome meeting Iggy and Chef André tonight, as well as the great Daniel Boulud who's opening a new restaurant Bar Boulud here in London, and a Daniel in Marina Bay Sands in Singapore. By the end of the year, there'd be so many more new restaurants to try in Singapore. Plus Chef André will be starting his own new restaurant, can't wait! Iggy's will also be relocating to Hilton. Will have somehow get myself on a trip back in order to check out these new place!
Anyway, congrats also to Gunther's (#84) and Les Amis (#78), well done!! 4 Singaporean restaurants in Top 100, with 2 in Top 50 (which is the same as Japan and Australia!) is not too shabby at all!
Labels:
food
April 21, 2010
Memories of Turkey and Greece
I've been really lazy lately about posting and a busy work schedule isn't helping. I've taken to tweeting short updates but guess that's quite different from a full post. The long awaited pictures from the Turkey and Greece holiday are finally here.
I love love love Santorini! It's an amazingly gorgeous place with pastel coloured houses perched on the cliff of a caldera. Maybe because we went during off-peak season, so it wasn't chock-a-block with tourists overcrowding every single spot. It felt really peaceful and if I had more time, I'd have gladly spent it there lazing around, reading and just taking it slow. We stayed in Firastefani, the neighbouring village to the main town of Fira, which was just a short 10-15 scenic walk away. It afforded us better views and away from the hustle and bustle of Fira. Other than the main sights of blue-domed churches, pastel coloured cliff houses, the caldera and volcanic island, there are also black and red sand beaches and quaint villages dotted around the island. Oia, the village at the northern tip of the caldera was especially pretty and supposedly has the most spectacular sunsets. I say supposedly because it was pretty cloudy the day we went and while we did see the sunset, there were way too many clouds.
Another highlight of our trip was the Good Friday celebrations in the town of Pyrgos. Situated at one of the highest points on the island, the church is perched right at the top and every Easter, they re-enact the events around Jesus' crucifixion and resurrection. A funeral service is held, where people from all over the island come to pay their 'respects' and subsequently, the icon symbolising Jesus is carried out of the church and brought around the village. As that takes place, the village youths set fire to cans that line the spiraling periphery of the village pathways, creating an amazing sight. The pictures below don't really do justice to the magnificent fire display.


Let me leave you with a picture essay as a picture paints a thousand words. These are a selection of the squillion photos I took. Enjoy!

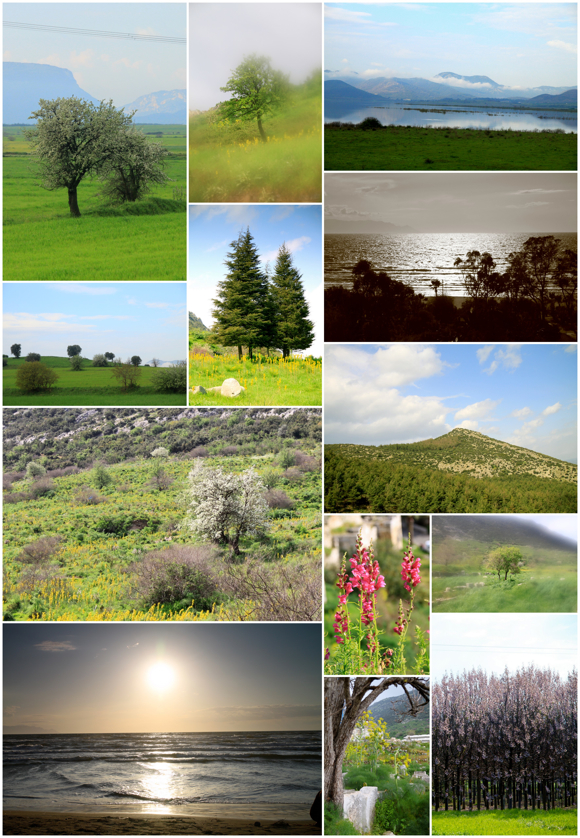
Ancient town of Ephesus & other ruins
Athens Sights and Pantheon
The amazing natural scenery in Santorini - volcano, caldera, sunsets, blue seas and skies!
Cliff houses in Santorini
Santorini details and miscellaneous shots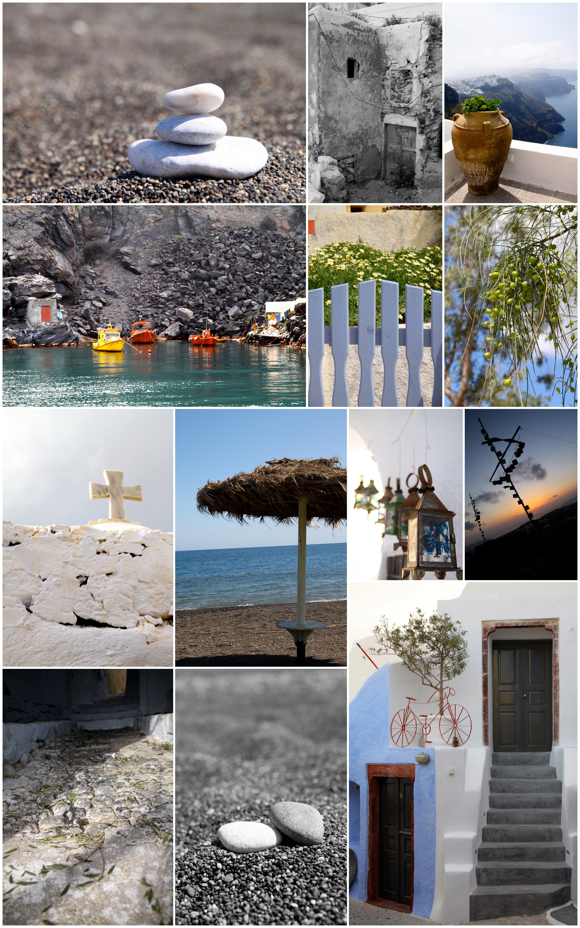
The classic blue domed churches of Santorini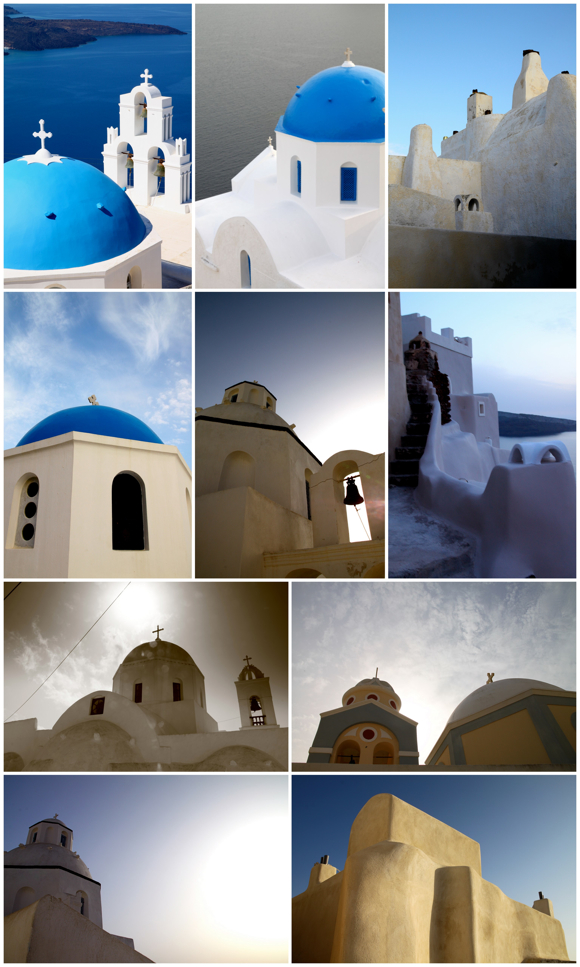
Cats and dogs in Greece and Turkey
Doors of Santorini
I love love love Santorini! It's an amazingly gorgeous place with pastel coloured houses perched on the cliff of a caldera. Maybe because we went during off-peak season, so it wasn't chock-a-block with tourists overcrowding every single spot. It felt really peaceful and if I had more time, I'd have gladly spent it there lazing around, reading and just taking it slow. We stayed in Firastefani, the neighbouring village to the main town of Fira, which was just a short 10-15 scenic walk away. It afforded us better views and away from the hustle and bustle of Fira. Other than the main sights of blue-domed churches, pastel coloured cliff houses, the caldera and volcanic island, there are also black and red sand beaches and quaint villages dotted around the island. Oia, the village at the northern tip of the caldera was especially pretty and supposedly has the most spectacular sunsets. I say supposedly because it was pretty cloudy the day we went and while we did see the sunset, there were way too many clouds.
Another highlight of our trip was the Good Friday celebrations in the town of Pyrgos. Situated at one of the highest points on the island, the church is perched right at the top and every Easter, they re-enact the events around Jesus' crucifixion and resurrection. A funeral service is held, where people from all over the island come to pay their 'respects' and subsequently, the icon symbolising Jesus is carried out of the church and brought around the village. As that takes place, the village youths set fire to cans that line the spiraling periphery of the village pathways, creating an amazing sight. The pictures below don't really do justice to the magnificent fire display.


Let me leave you with a picture essay as a picture paints a thousand words. These are a selection of the squillion photos I took. Enjoy!
Istanbul Sights and Sounds

Istanbul Details


Amazing nature in Ephesus

Ancient town of Ephesus & other ruins

Athens Sights and Pantheon

The amazing natural scenery in Santorini - volcano, caldera, sunsets, blue seas and skies!

Cliff houses in Santorini

Santorini details and miscellaneous shots

The classic blue domed churches of Santorini

Cats and dogs in Greece and Turkey

Doors of Santorini

Labels:
prettythings,
travel
Subscribe to:
Comments (Atom)


